Have you ever thought about implementing your own indoor temperature and humidity detection system? I used the weekend to accomplish this small goal. I used ESP8266 and DHT11, and sent the collected data to the server program through WIFI and stored it in a SQLite database. In the following introduction, I will share with you how to accomplish this task.

First, I want to explain why I chose ESP8266 and DHT11. ESP8266 is a low-cost Wi-Fi microchip with full-stack TCP/IP protocol. With the help of this chip, we can easily connect any microcontroller to a Wi-Fi network. The DHT11 is a temperature and humidity sensor with calibrated digital output. Its main advantages are high accuracy, fast response speed, strong anti-interference ability, and low price.
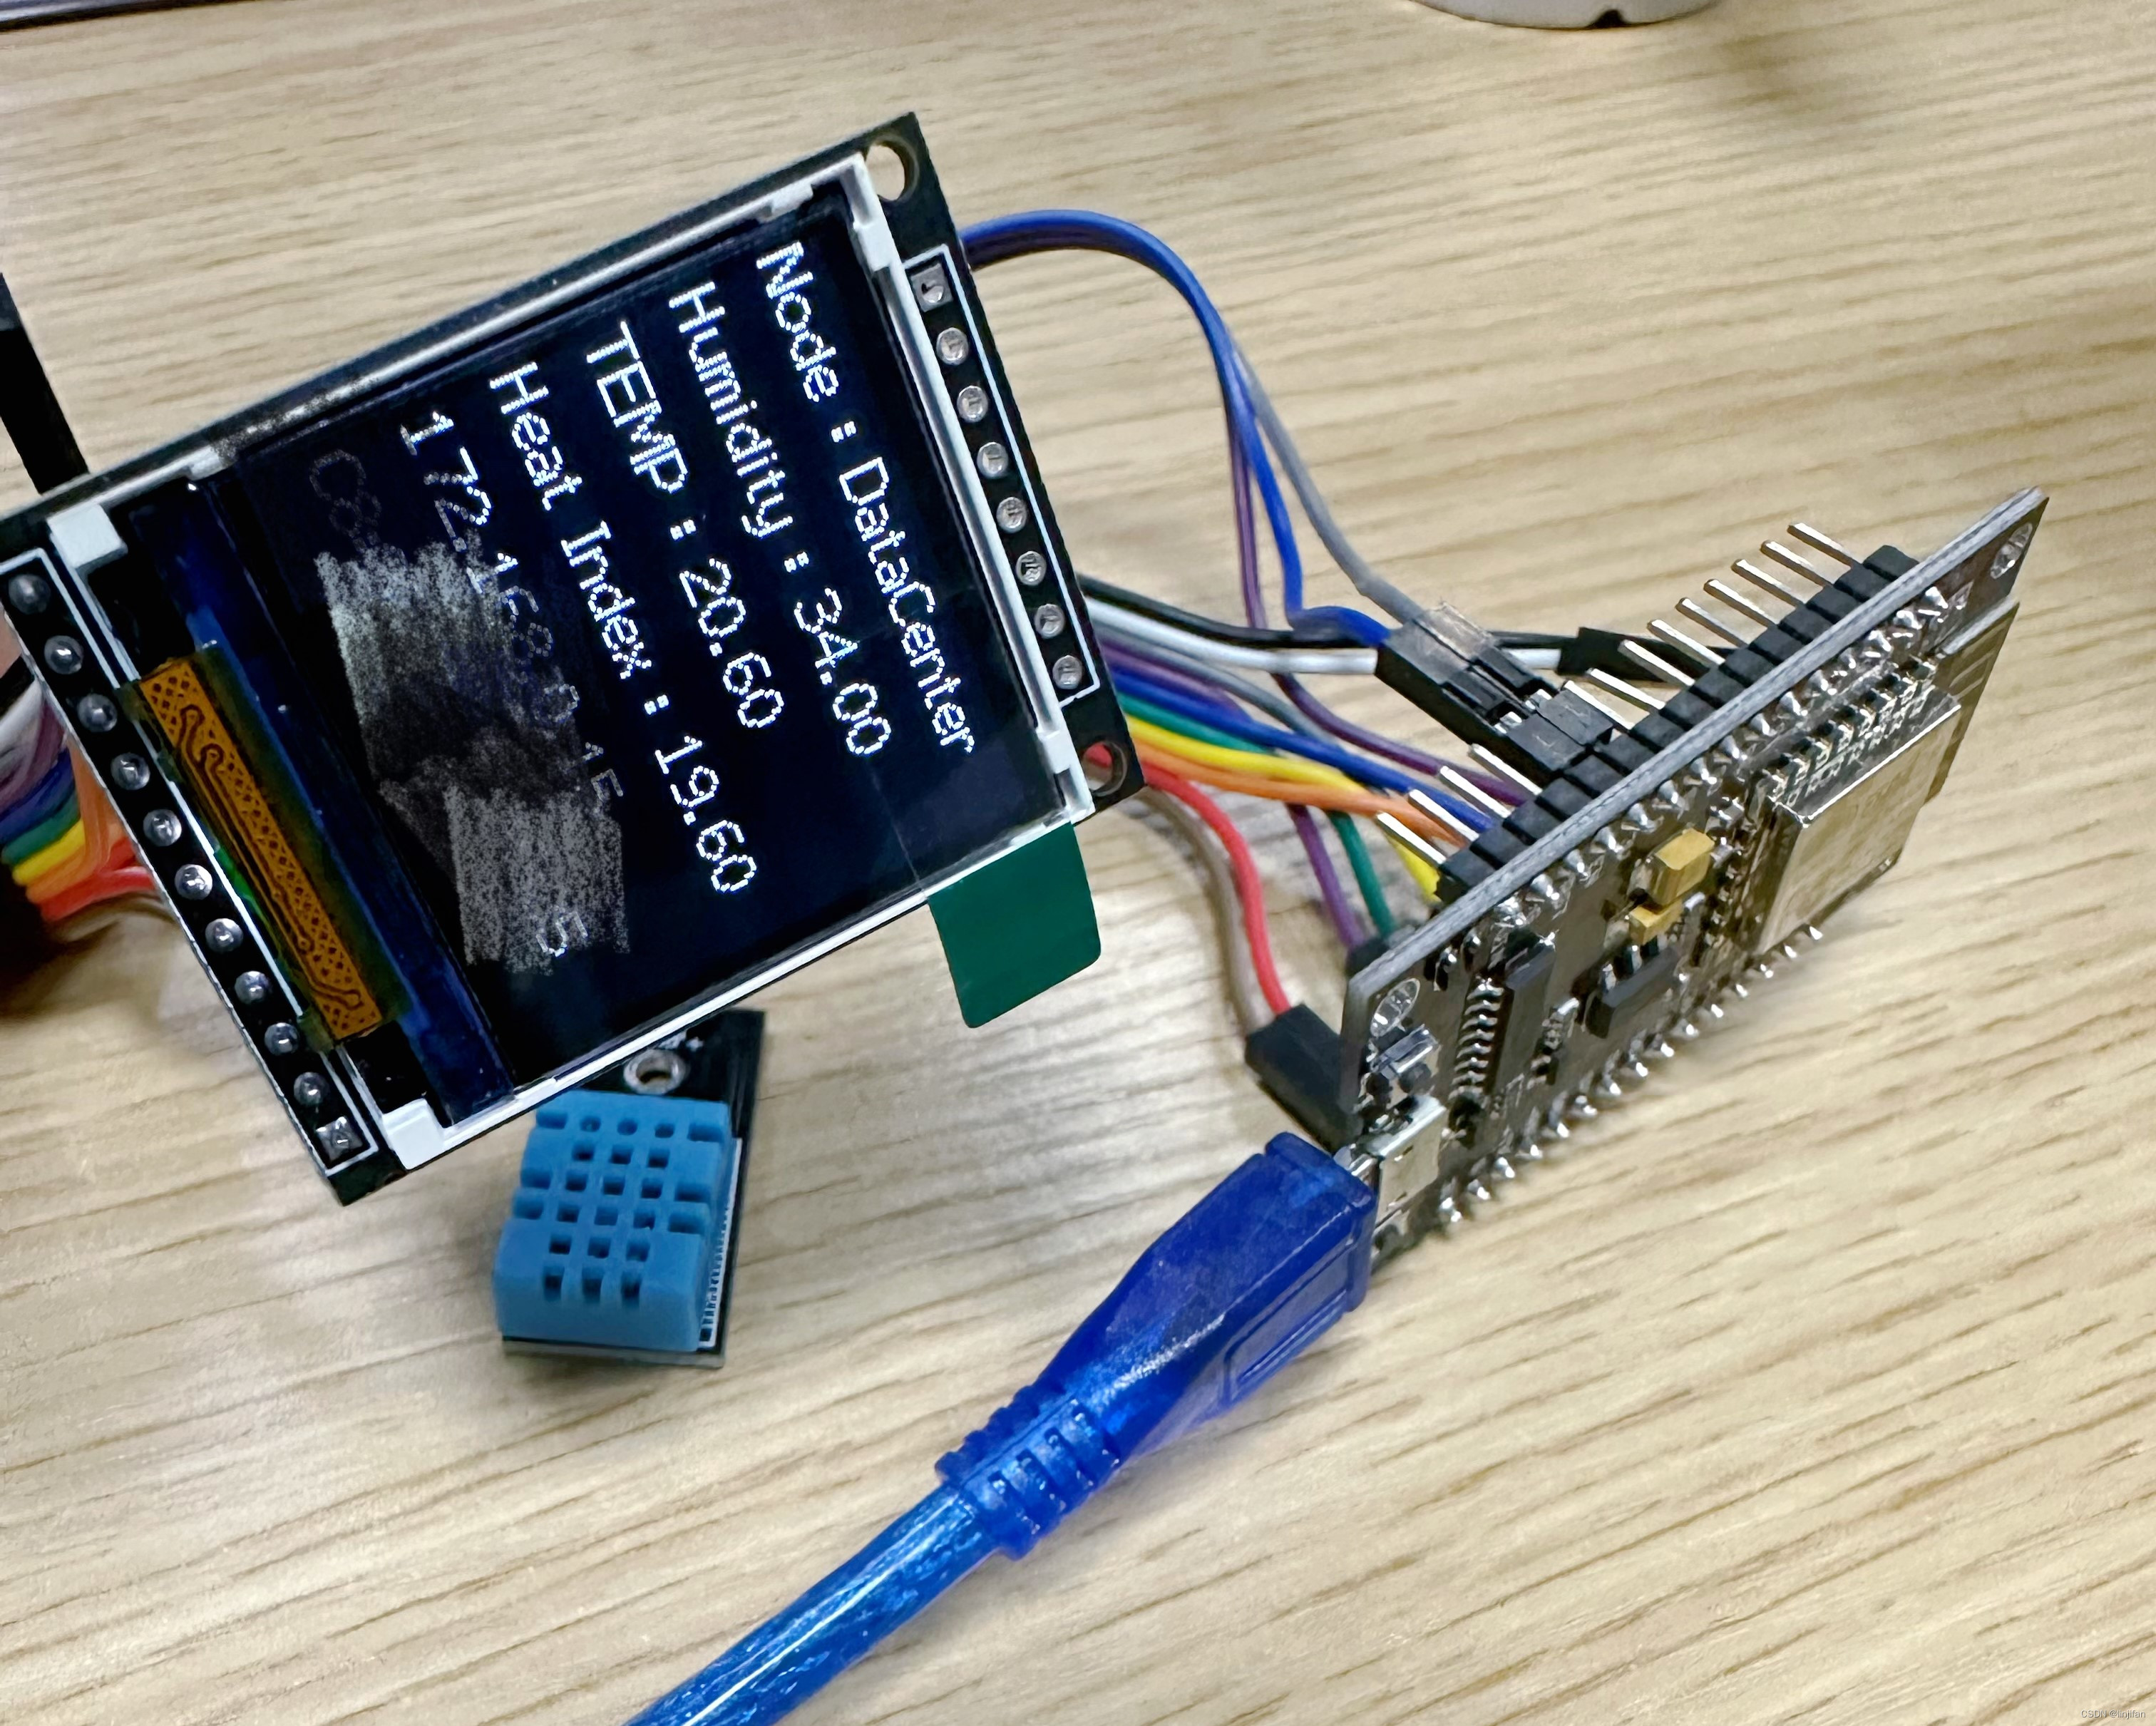
In terms of hardware connection, 3V3 and GND of ESP8266 are connected to VCC and GND of DHT11 respectively, and D4 of ESP8266 is connected to the data terminal of DHT11. In this way, we can read temperature and humidity data from DHT11 through ESP8266.
Next is the programming part. First, we need to run a program on the ESP8266 that will periodically read temperature and humidity data from the DHT11 and send this data to our server program via Wi-Fi. In this program, we have used DHT library and ESP8266WiFi library. The DHT library allows us to easily read data from the DHT11, while the ESP8266WiFi library enables the ESP8266 to connect to Wi-Fi.
The server program is a simple Python script running on the server. It listens for connections from the ESP8266 and writes the received temperature and humidity data into the SQLite database. In this script, we use the WebAPI library to handle network connections and the sqlite3 library to operate the SQLite database.
After completing this project, I can not only check the indoor temperature and humidity at any time, but also understand the indoor temperature and humidity change trends, alarms, etc. by analyzing the data in the SQLite database.
Finally, I want to emphasize that although I have introduced in detail how to use ESP8266 and DHT11 to collect indoor temperature and humidity and send it to the server program through WIFI, this is only one of the methods. You can choose different hardware and software according to your own needs and conditions to achieve your own small goals. I hope my experience can provide you with some inspiration.
Development tools: Arduino IDE 2.2.1
Hardware: ESP8266 development board, DHT12 temperature and humidity module, ST7735 TFT screen
The QR code will be displayed on the screen when the program is used for the first time, and it supports scanning the code with WeChat to configure WIFI.
// ############################################ #####################################
//
// Temperature and humidity collection client
//
// Version: 1.0.01
//
// Create by linjifan 2023-11-11
// ############################################### ##################################
// Suitable indoor temperature: 19-26 degrees, humidity: 20-85 RH%
//


//Image decoding library
#include <TJpg_Decoder.h>
//json library, used for web page parsing
#include <ArduinoJson.h>
//Time library, used for clock part
#include <TimeLib.h>
//wifi library
#include <ESP8266WiFi.h>
//http request library
#include <ESP8266HTTPClient.h>
//Create a library for wifi udp service
#include <WiFiUdp.h>
//Static storage area, used to store some fixed parameters
#include <EEPROM.h>
//Anxin can be equipped with network QR code
#include "qr.h"
#include <DHT.h>
#include <SPI.h>
#include "libraries\TFT_eSPI\TFT_eSPI.h"

//Configure ESP8266 GPI1 port
#define DHTPIN 5
//Official adaptation includes: DHT11, DHT12, DHT21, DHT22, AM2301
#define DHTTYPE DHT11
DHT dht(DHTPIN, DHTTYPE);

// Please configure the pins yourself in the User_Setup.h file in the tft_espi library
TFT_eSPI tft = TFT_eSPI();
TFT_eSprite clk = TFT_eSprite( & amp;tft);

WiFiClient wificlient;
uint32_t targetTime = 0;
byte loadNum = 6;

//Upload collection interval waiting time
const uint32_t sleepTime = 1000 * 60;
//Node name
const char node[] = "DataCenter";
//---------------Modify the information in "" here. It needs to be modified only if the distribution network is invalid. Generally, there is no need to change--
//WIFI name
const char ssid[] = "";
//WIFI password
const char pass[] = "";

bool tft_output(int16_t x, int16_t y, uint16_t w, uint16_t h, uint16_t* bitmap) {
  if (y >= tft.height()) return 0;
  tft.pushImage(x, y, w, h, bitmap);
  // Return 1 to decode next block
  return 1;
}

void setup(void) {
  Serial.begin(115200);
  Serial.println(F("DHT11 test!"));

  //DHT11 module initialization
  dht.begin();
  delay(2000);

  /* TFT init */
  tft.begin();
  //Invert all display colors: 1 for inversion, 0 for normal
  tft.invertDisplay(1);
  tft.fillScreen(0xFFFF);
  tft.setTextColor(TFT_WHITE, 0xFFFF);
  //Set the rotation angle of the screen display, the parameters are: 0, 1, 2, 3
  // Represents 0°, 90°, 180°, 270° respectively
  //Rotate according to actual needs
  tft.setRotation(4);

  TJpgDec.setJpgScale(1);
  TJpgDec.setSwapBytes(true);
  TJpgDec.setCallback(tft_output);

  targetTime = millis() + 1000;

  Serial.print("Connecting to WIFI...");
  Serial.println(ssid);

  WiFi.begin(WiFi.SSID().c_str(), WiFi.psk().c_str());

  TJpgDec.setJpgScale(1);
  TJpgDec.setSwapBytes(true);
  TJpgDec.setCallback(tft_output);
  tft.fillScreen(0xFFFF);
  while (WiFi.status() != WL_CONNECTED) {
    loading(70);

    if (loadNum >= 94) {
      SmartConfig();
      break;
    }
  }
  delay(10);
  // while(loadNum < 94) //Let the animation finish
  // {
  // loading(1);
  // }

  Serial.print("Local IP: ");
  Serial.println(WiFi.localIP());
  Serial.print("MAC address: ");
  Serial.println(WiFi.macAddress());

  tft.fillScreen(0xFFFF);
  //Show inspection window
  clk_check();

  delay(5000);
}

//Draw the inspection window
void clk_check() {
  clk.createSprite(120, 120);
  clk.fillSprite(0xFFFF);
  clk.setTextDatum(CL_DATUM);
  clk.setTextColor(TFT_GREEN, 0xFFFF);
  clk.drawString("DHT11....OK", 10, 20, 2);
  clk.drawString("WiFi...OK", 10, 40, 2);
  clk.pushSprite(0, 0);
  clk.deleteSprite();
}

//Draw progress bar
void loading(byte delayTime) {
  clk.setColorDepth(8);
  //Create window
  clk.createSprite(100, 100);
  // fill rate
  clk.fillSprite(0xFFFF);
  // Hollow rounded rectangle
  clk.drawRoundRect(0, 0, 100, 16, 8, 0x0000);
  // solid rounded rectangle
  clk.fillRoundRect(3, 3, loadNum, 10, 5, 0x0000);
  //Set text data
  clk.setTextDatum(CC_DATUM);
  clk.setTextColor(TFT_GREEN, 0xFFFF);
  clk.drawString("Connect WiFi...", 50, 40, 2);
  clk.drawString("Ver: 1.0.01", 50, 80, 1);
  clk.setTextColor(TFT_WHITE, 0xFFFF);
  // window position
  clk.pushSprite(14, 30);
  clk.deleteSprite();
  loadNum + = 1;
  delay(delayTime);
}

//WeChat distribution network, pay attention to connect to 2.4g network
void SmartConfig(void) {
  //Set STA mode
  WiFi.mode(WIFI_STA);
  //tft.pushImage(0, 0, 240, 240, qr);
  //tft.pushImage(0, 0, 240, 240, qr);
  TJpgDec.drawJpg(0, 0, qr, sizeof(qr));
  //Print log information
  Serial.println("\r\
Wait for Smartconfig...");
  // Start SmartConfig and wait for the mobile phone to send the user name and password
  WiFi.beginSmartConfig();
  while (1) {
    Serial.print(".");
    // wait for a second
    delay(100);
    // Network configuration is successful, SSID and password received
    if (WiFi.smartConfigDone()) {
      Serial.println("SmartConfig Success");
      Serial.printf("SSID:%s\r\
", WiFi.SSID().c_str());
      Serial.printf("PSW:%s\r\
", WiFi.psk().c_str());
      break;
    }
  }
  loadNum = 94;
}

//Upload temperature, humidity and other information to the server
void pushData(String h, String t, String i, String Node) {
  String URL = "http://172.168.0.XXX:5000/api/v1/weather/Update?h=" + h + " & amp;t=" + t + " & amp;i=" + i + " & amp;time=" + String(now()) + " & amp;node=" + Node + " & amp;mac=" + WiFi.macAddress();

  HTTPClient httpClient;
  //Configure the request address. You can also simply use the port number and PATH here instead of
  httpClient.begin(wificlient, URL);
  //Set the User-Agent in the request header
  httpClient.setUserAgent("Mozilla/5.0 (iPhone; CPU iPhone OS 11_0 like Mac OS X) AppleWebKit/604.1.38 (KHTML, like Gecko) Version/11.0 Mobile/15A372 Safari/604.1");
  //httpClient.addHeader("Referer", "http://www.weather.com.cn/");
  //Start the connection and send HTTP request
  int httpCode = httpClient.GET();
  Serial.print("Send GET request to URL: ");
  Serial.println(URL);

  //If the server responds OK, get the response body information from the server and output it through the serial port
  if (httpCode == HTTP_CODE_OK) {
    String str = httpClient.getString();
    Serial.println(str);
  } else {
    Serial.println("Reported data error:");
    Serial.println(httpCode);
    //Display red failure status
    drawIndicatorLight(120, 120, TFT_NAVY);
    delay(200);
  }
  //Close the connection between ESP8266 and the server
  httpClient.end();
}


void loop() {

  // Reading temperature or humidity takes approximately 250 milliseconds!
  // Sensor readings may also be up to 2 seconds "old" (it's a very slow sensor)
  float h = dht.readHumidity();
  // Read the temperature in degrees Celsius (default)
  float t = dht.readTemperature();
  // Read the temperature as Fahrenheit (isFahrenheit = true)
  float f = dht.readTemperature(true);

  // Check if there are any read failures and exit early (try again).
  if (isnan(h) || isnan(t) || isnan(f)) {
    Serial.println(F("Failed to read from DHT sensor!"));
    return;
  }

  // Calculate the Fahrenheit Heat Index (default)
  float hif = dht.computeHeatIndex(f, h);
  // Calculate heat index in degrees Celsius (isfahrenheit = false)
  float hic = dht.computeHeatIndex(t, h, false);

  //Print the value (the Fahrenheit value is commented out)
  //Print humidity
  Serial.print(F("Humidity: "));
  Serial.print(h);
  //Print temperature
  Serial.print(F("% Temperature: "));
  Serial.print(t);
  Serial.print(F("°C "));
  //Serial.print(f);
  //Serial.println(F("°F"));
  //Print thermal index
  Serial.print(F(" Heat index: "));
  Serial.print(hic);
  Serial.print(F("°C "));
  Serial.println();

  clk.createSprite(120, 120);
  clk.fillSprite(0xFFFF);

  clk.setTextDatum(CL_DATUM);
  clk.setTextColor(TFT_BLACK, TFT_WHITE);
  clk.drawString("Node : " + String(node), 0, 10, 2);
  clk.drawString("Humidity : " + String(h), 0, 30, 2);
  clk.drawString("TEMP : " + String(t), 0, 50, 2);
  clk.drawString("Heat Index : " + String(hic), 0, 70, 2);
  clk.drawString(WiFi.localIP().toString().c_str(), 0, 90, 2);
  clk.drawString(WiFi.macAddress(), 0, 110, 2);
  clk.pushSprite(0, 0);
  clk.deleteSprite();
  //Report data
  drawIndicatorLight(120, 120, TFT_BLACK);
  pushData(String(h), String(t), String(hic), node);
  drawIndicatorLight(120, 120, TFT_WHITE);
  delay(sleepTime);
}


void drawIndicatorLight(int x, int y, uint16_t color) {
  // Draw a filled circle with radius 5
  tft.fillCircle(x, y, 3, color);
}