1 screen post-processing process
? To adjust screen brightness, saturation, and contrast, you need to use screen post-processing technology. Therefore, this article will first introduce the screen post-processing process, and then introduce the implementation of adjusting screen brightness, saturation, and contrast.
? For the complete resources of this article, see →Unity3D adjust screen brightness, saturation, and contrast.
? Screen post-processing means: after all objects are rendered, a screen image is obtained, and the process of further processing the screen image is called screen post-processing. Screen post-processing is generally performed in the OnRenderImage method of the MonoBehaviour life cycle, as follows, src is the screen image after rendering all objects, and dest is the target image obtained after screen post-processing. If the user wants to call the OnRenderImage method immediately after the opaque Pass is executed, the [ImageEffectOpaque] tag can be added in front of the OnRenderImage method.
// [ImageEffectOpaque] // Call the OnRenderImage method immediately after the opaque Pass is executed
void OnRenderImage(RenderTexture src, RenderTexture dest)
? In the OnRenderImage method, the Graphics.Blit method is usually used to complete the texture processing. The following is the commonly used Bilt method. source is the source texture, dest is the target texture, and mat is the material for screen post-processing. Realize screen post-processing special effects in a given Shader. Note that the Shader for post-screen processing must contain a texture attribute named “_MainTex”. When the user calls the Graphics.Blit method, the source will be automatically assigned to the _MainTex attribute in the Shader.
public static void Blit(Texture source, RenderTexture dest)
public static void Blit(Texture source, RenderTexture dest, Material mat, [Internal. DefaultValue("-1")] int pass)
public static void Blit(Texture source, Material mat, [Internal. DefaultValue("-1")] int pass)
? In addition, the user can also achieve the Graphics.Blit effect through CommandBuffer.DrawRenderer and Graphics.ExecuteCommandBuffer. For details, see the case: selected object stroke special effect, the main process is as follows:
CommandBuffer commandBuffer = new CommandBuffer();
RenderTexture tempTex = RenderTexture. GetTemporary(Screen. width, Screen. height, 0);
commandBuffer. SetRenderTarget(tempTex);
commandBuffer.ClearRenderTarget(true, true, Color.clear); // Set the template clear screen color to (0,0,0,0)
commandBuffer.DrawRenderer(renderer, effectMaterial); // renderer is the Render component of the object, and effectMaterial is the special effect material
Graphics. ExecuteCommandBuffer(commandBuffer);
// use tempTex
RenderTexture.ReleaseTemporary(tempTex); // After using tempTex, it needs to be released
? In Shader, users can also grab screen images through GrabPass. For details, see Case: Reflection and Refraction.
2 Brightness, Saturation, Contrast
? 1) Brightness
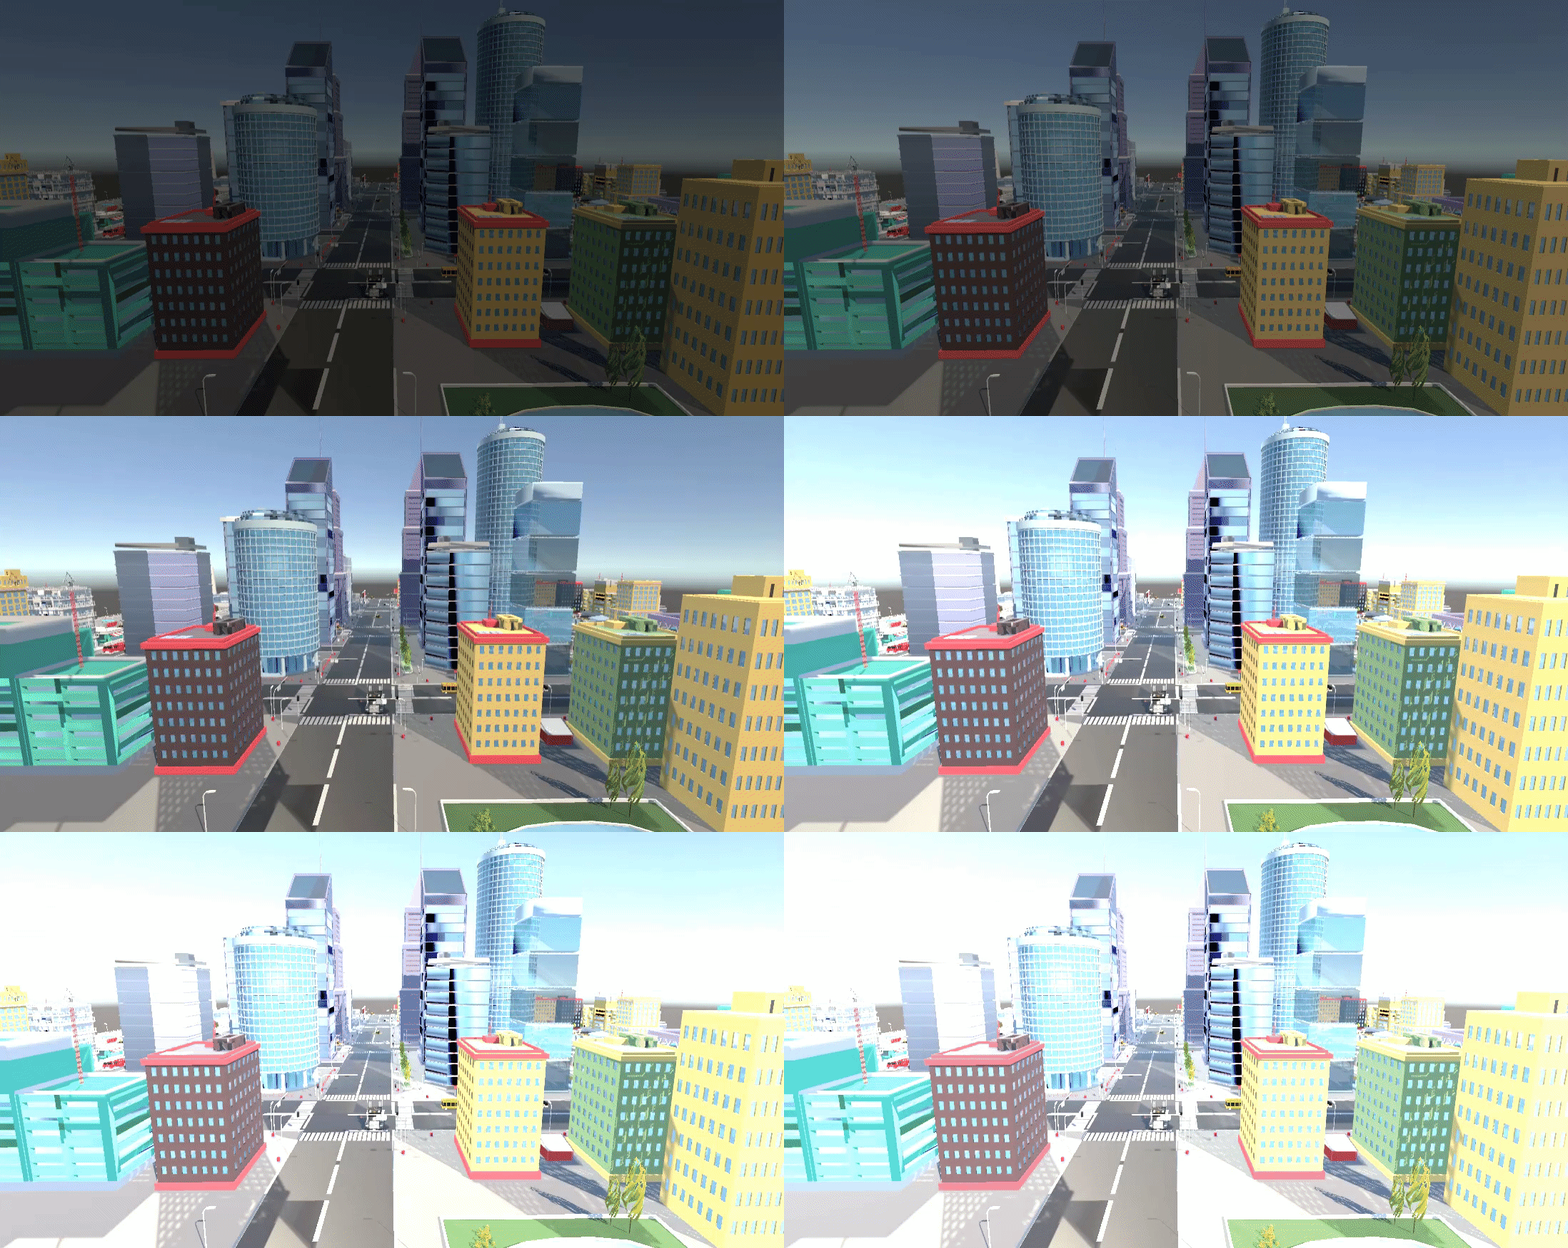
? Brightness indicates the lightness and darkness of the color. The higher the brightness, the brighter the color and the higher the gray value.
? 2) Saturation
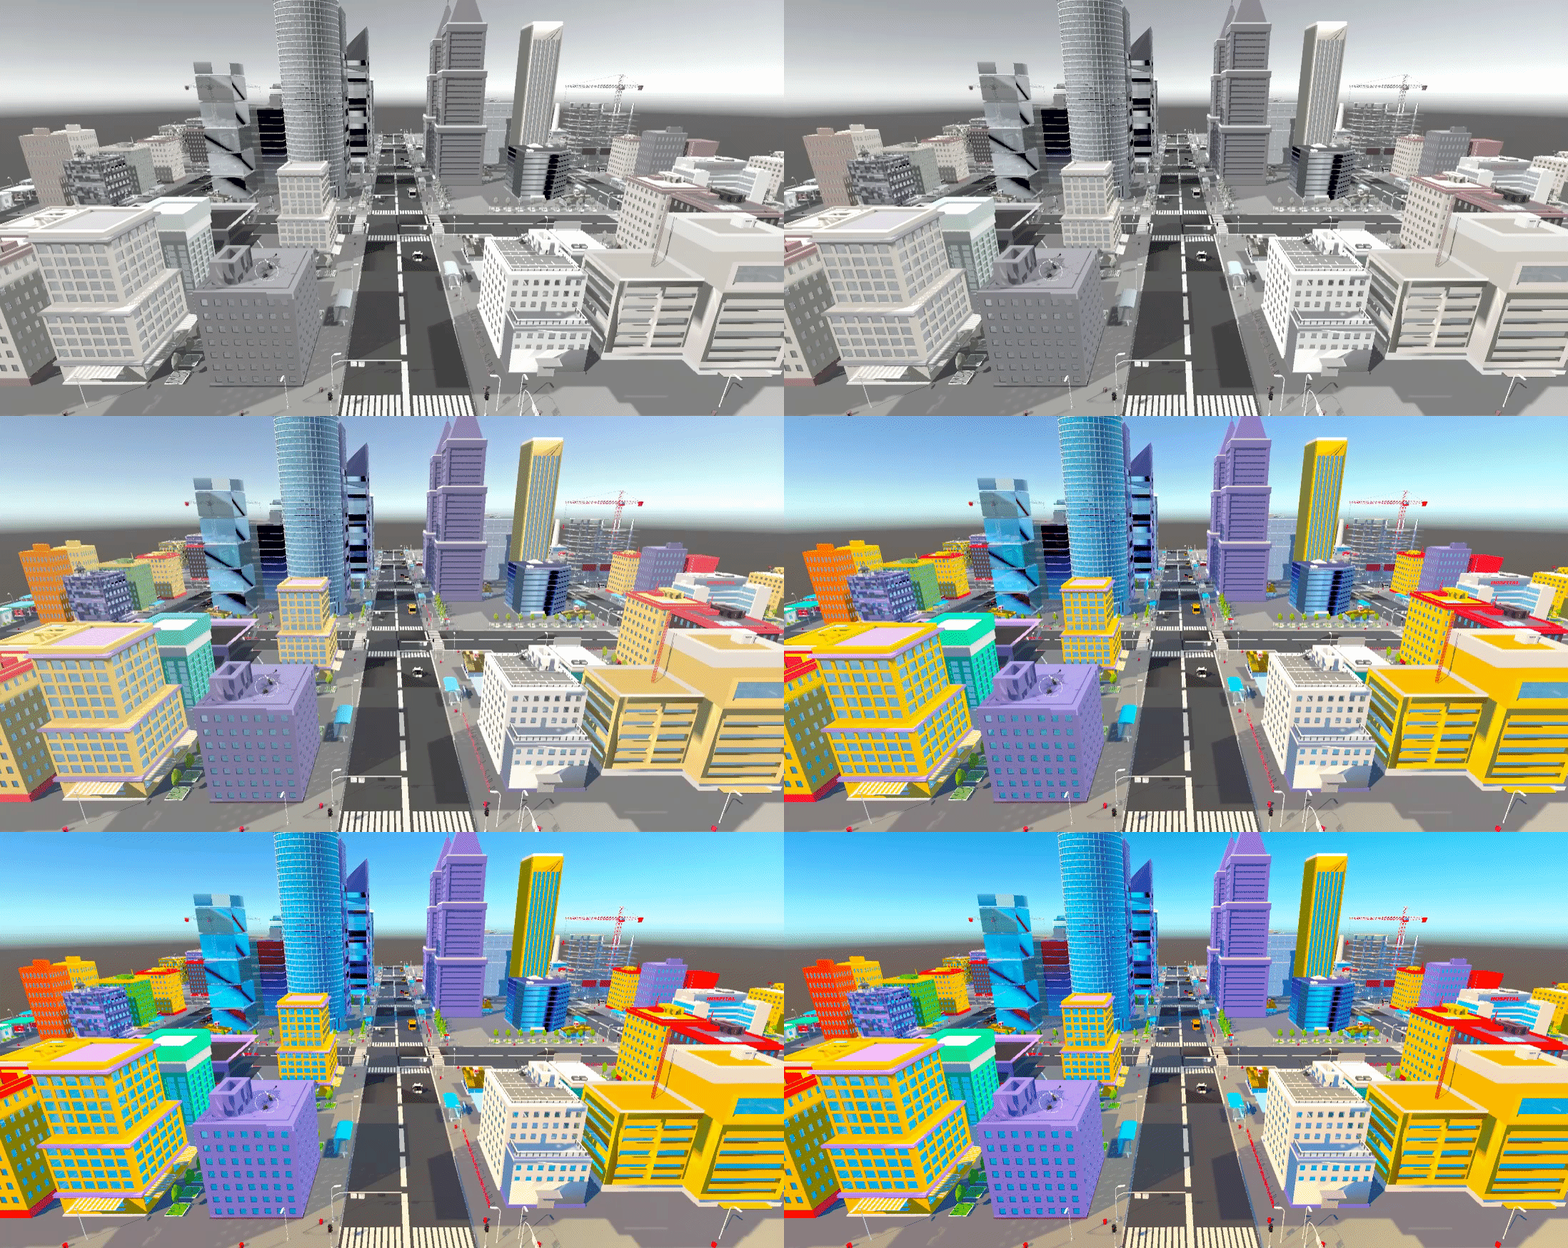
? Saturation refers to the vividness of the color, also known as the purity of the color. Saturation is determined by the ratio of chromatic and achromatic (gray) components in the color. The larger the color component, the greater the saturation; the larger the achromatic component, the smaller the saturation. Pure colors are highly saturated, such as bright red, bright green. Colors mixed with white, gray or other shades are unsaturated colors, such as purple, pink, tan, etc. A fully desaturated color has no hue at all, like the shades of gray between black and white.
? 3) Contrast
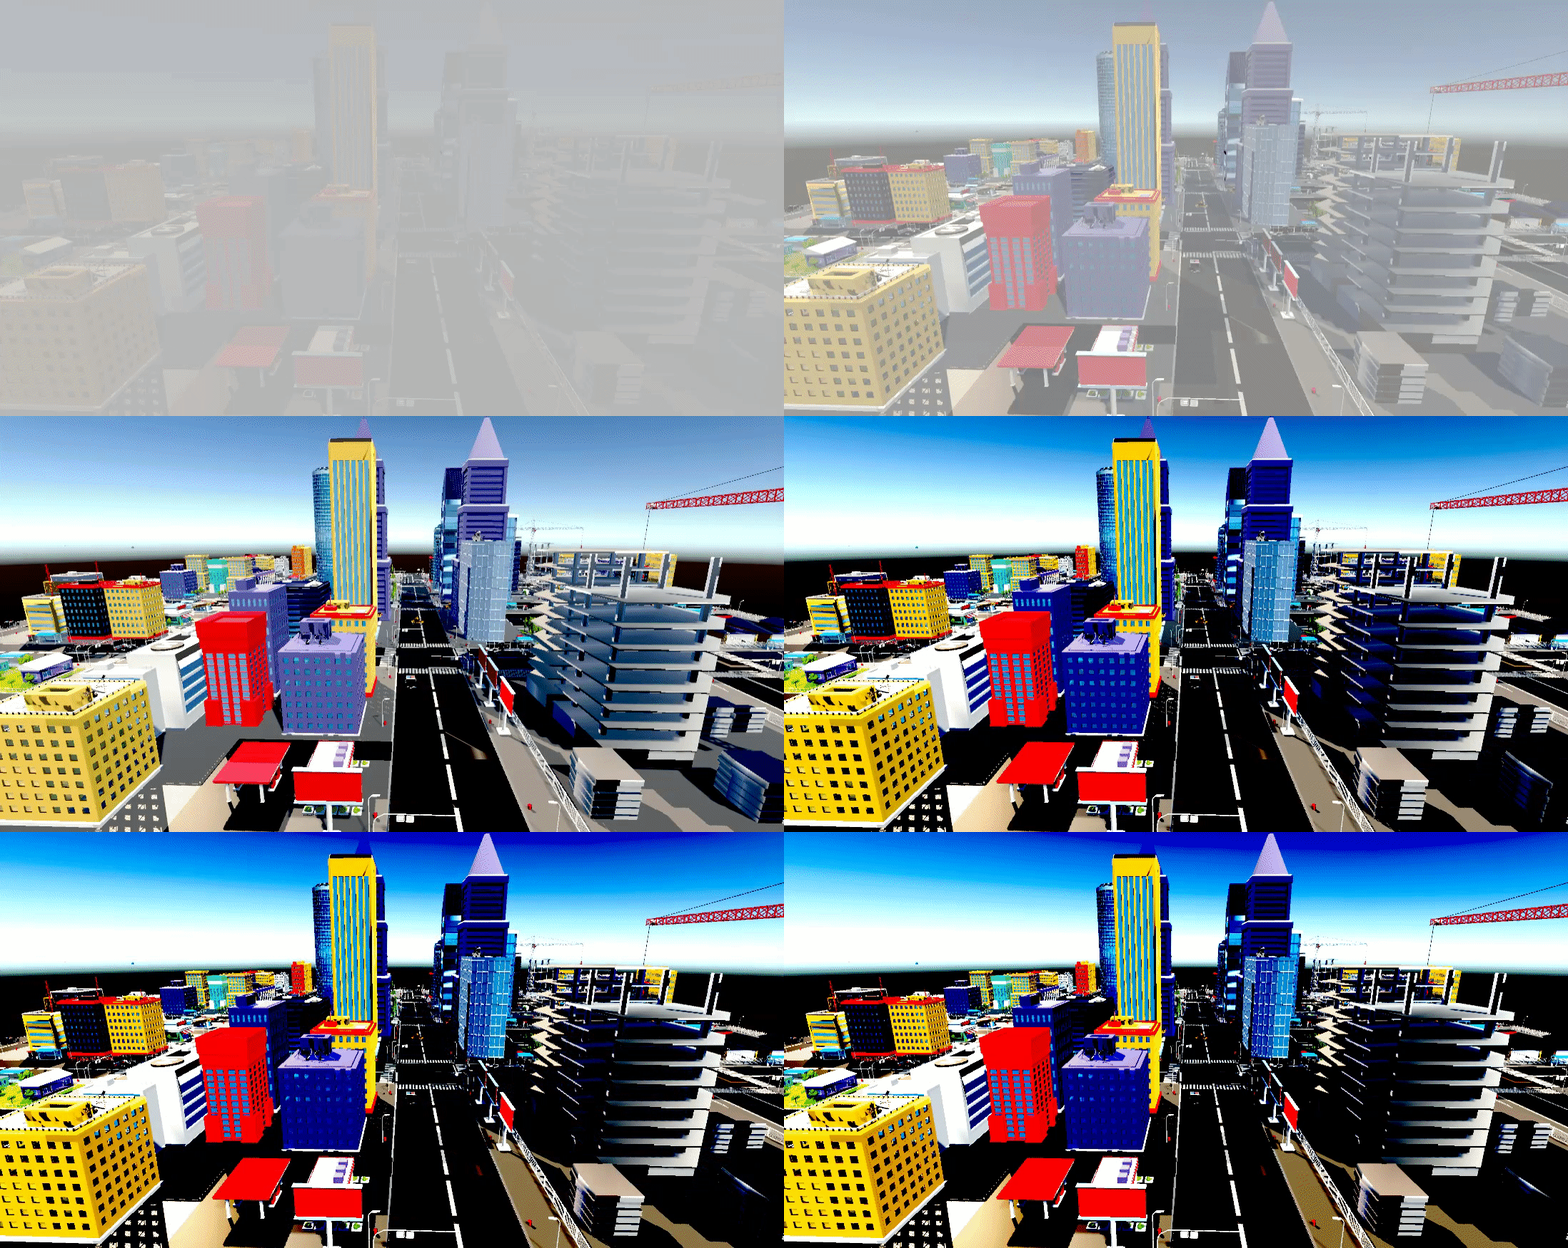
? Contrast refers to the size of the gray contrast of an image, that is, the ratio of the maximum brightness to the minimum brightness. The greater the contrast, the greater the contrast between different colors, and black and white are distinct. If the contrast is too large, the image will appear dazzling; the smaller the contrast, the smaller the contrast between different colors. If the contrast is too small, the picture will appear gray.
3 code implementation
?BrigSatuCont.cs
using UnityEngine;

[ExecuteInEditMode] // In edit mode, you can view the running effect of the script
[RequireComponent(typeof(Camera))] // requires camera component
public class BrigSatuCont : MonoBehaviour {
    [Range(0.1f, 3.0f)]
    public float brightness = 1.0f; // brightness
    [Range(0.1f, 3.0f)]
    public float saturation = 1.0f; // saturation
    [Range(0.1f, 3.0f)]
    public float contrast = 1.0f; // contrast
    private Material material; // material

    private void Start() {
        material = new Material(Shader. Find("MyShader/BrightnessSaturationContrast"));
        material.hideFlags = HideFlags.DontSave;
    }

    //[ImageEffectOpaque] // Call the OnRenderImage method immediately after the opaque Pass is executed
    void OnRenderImage(RenderTexture src, RenderTexture dest) {
        if (material != null) {
            material.SetFloat("_Brightness", brightness); // set brightness
            material.SetFloat("_Saturation", saturation); // set saturation
            material.SetFloat("_Contrast", contrast); // set the contrast
            Graphics. Blit(src, dest, material);
        } else {
            Graphics. Blit(src, dest);
        }
    }
}
?BrigSatuCont. Shader
Shader "MyShader/BrightnessSaturationContrast" { // adjust brightness, saturation, contrast
    Properties {
        _MainTex ("Base (RGB)", 2D) = "white" {} // main texture
        _Brightness ("Brightness", Float) = 1 // Brightness
        _Saturation("Saturation", Float) = 1 // Saturation
        _Contrast("Contrast", Float) = 1 // Contrast
    }

    SubShader {
        Pass {
            // Depth test always passes, turn off depth writing
            ZTest Always ZWrite Off

            CGPROGRAM
            #pragma vertex vert_img // Use the built-in vert_img vertex shader
            #pragma fragment frag
            #include "UnityCG.cginc"

            sampler2D _MainTex; // main texture
            half _Brightness; // brightness
            half _Saturation; // saturation
            half _Contrast; // contrast

            fixed4 frag(v2f_img i): SV_Target { // v2f_img is a built-in structure, which only contains pos and uv
                fixed4 tex = tex2D(_MainTex, i.uv); // texture sampling
                fixed3 finalColor = tex.rgb * _Brightness; // apply brightness _Brightness
                fixed luminance = 0.2125 * tex.r + 0.7154 * tex.g + 0.0721 * tex.b; // calculate luminance
                fixed3 luminanceColor = fixed3(luminance, luminance, luminance); // The color with saturation 0 and brightness luminance
                finalColor = lerp(luminanceColor, finalColor, _Saturation); // apply saturation _Saturation
                fixed3 avgColor = fixed3(0.5, 0.5, 0.5); // Color with saturation 0 and lightness 0.5
                finalColor = lerp(avgColor, finalColor, _Contrast); // apply contrast _Contrast
                return fixed4(finalColor, tex.a);
            }

            ENDCG
        }
    }

    Fallback Off
}
? Note: vert_img is Unity’s built-in vertex shader, and v2f_img is Unity’s built-in structure variable. For the implementation of vert_img and v2f_img, see→Shader constants, variables, structures, and functions.
? Operation effect:
? 1) Adjust brightness

2) Adjust saturation

3) Adjust the contrast
