RT: WoW ! Enjoy the current weather with Picasso’s painting!!
Project Introduction
Hello everyone! I wanted to share a fun project I’ve been working on!

That’s pretty much everything I see in thumbnails. I will briefly describe the project.
My current project is very similar to the ones I have created before. So see my previous project for more details.
Chat GPT API + Youtube Comment + Weather

Here’s a simple flowchart! I only changed the LCD configuration from my previous project. I’m going to bring some parts that I’ve used in previous projects, such as the web crawler and the chat GPT, albeit in a simplified way.
Web crawling
First of all, it’s weather information, and I want to read it in a fun way, like the weather broadcaster told me, not just weather information. So I decided to use GPT API to read it. GPT does not currently support real-time data services. So I decided to read it as WebCrawling on Naver. It starts out in a relatively lightweight and easy-to-implement Python environment.
from bs4 import BeautifulSoup
def getweather() :
    html = requests.get('http://search.naver.com/search.naver?query= + ')
    soup = BeautifulSoup(html. text, 'html. parser')
    global weather
    weather = ''

    address = "Bundang Sunae"
    weather + = address + '*'

    weather_data = soup. find('div', {'class': 'weather_info'})

    # Current Temperature
    temperature = (str(weather_data.find('div', {'class': 'temperature_text'}).text.strip()[5:])[:-1])
    weather + = temperature + '*'

    #WeatherStatus
    weatherStatus = weather_data.find('span', {'class': 'weather before_slash'}).text

    if weatherStatus == '':
        weatherPrint = 'Sunny'
    elif '':
        weatherPrint = 'Cloud'

    weather + = weatherPrint
WebCrawling can be done simply using a package called BeautifulSoup.
Let me talk briefly about crawling.
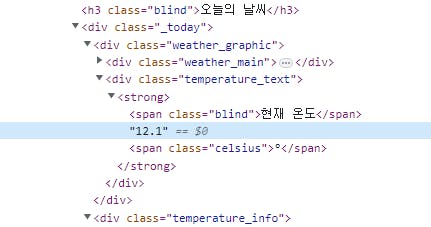
In the script, the temperature is read from temperature_text.

The weather is read in the weather span class before _slash.

I wanted to read it in english, but couldn’t find it, so I just hardcoded it… When you run it, it will look like this.

It outputs temperature and weather like this.
Chat GPT
I will convert it to chat GPT and get the data. The Chat GPT 3.5 API was recently officially released, making it easy to implement. Chat GPT requires an API key just like YouTube.

def Chat_GPT(api_key, query):
    global answer

    openai.api_key = api_key

    model = "gpt-3.5-turbo"

    messages = [
        {
            "role": "system",
            "content": "You are a very creative and interesting writer."
        },
        {
            "role": "user",
            "content": query
        }
    ]

    response = openai.ChatCompletion.create(
        model=model,
        messages=messages
    )
    answer = response['choices'][0]['message']['content']
    print(answer)
I assigned the following roles to Chat GPT and wrote prompts accordingly.
query = "The current weather is very {} with {} degrees. Create a creative story in this situation. No more than two sentences.".format(weather,temperature)
print(query)

Chat_GPT(api_key, query)
And in the main code, I send the information obtained by web crawling to GPT by typing in the prompt.
Dall-E-2
DALL-E 2 is an image generation tool created by OpenAI.
def dall_e2(answer):
    global image_url
    global image_data
    response = openai.Image.create(
        prompt=answer,
        n=1,
        size="256x256",
    )
    image_url = response['data'][0]['url']
    urllib.request.urlretrieve(image_url, "test.bmp")

    im = Image.open("test.bmp")
    im_resized = im.resize((220, 220))

    im_resized = im_resized.convert('P', palette=Image.ADAPTIVE, colors=16)

    im_resized.save("test_resized.bmp", format="BMP")
    with open("test_resized.bmp", "rb") as f:
        image_data = f. read()
    print(image_data)
The code structure of DALL-E 2 is as follows. One thing to note here is the image size part. Since I don’t have a separate memory, I save the picture in BMP format to the Flash of the Pico board and display it later.
However, when sending and receiving data, the image size cannot be larger than the size of the SRAM because the data is stored in the SRAM.
From my experience, the program does not work properly when the image size exceeds 53k. In the future I will upgrade this part so we can display cooler images.
Chat_GPT(api_key,query)
answer = "Picasso's painting of the story. '{}'".format(answer)
print(answer)
dall_e2(answer)
In the main code, we send the data received from GPT back to DALL-E 2 as shown below.
W5100S Ethernet
Now we need to send the received data to the Pico board via Ethernet.

WIZnet/RP2040-HAT-CircuitPython
The library for using the Wiznet Ethernet chip on Pico’s MCU RP2040 is at the link above. This library allows you to simply connect the W5100S to the Pico.
Next
Alright, we’re done with server-side coding. Now we need to encode on the client side i.e. W5100S-EVB-Pico.
First, I’m working in the CircuitPython environment. Therefore, the RP2040 needs to be set up for the CircuitPython environment.

Circuitpython Raspberry pi Pico
You can easily set up the RP2040 for the CircuitPython environment by downloading the UF2 file from the official website and placing it in a folder.
And you can see the execution process of the program through the serial port terminal.
Client W5100S Ethernet
Now it’s time for the client ethernet code.
##SPI0
SPI0_SCK = board.GP18
SPI0_TX = board.GP19
SPI0_RX = board.GP16
SPI0_CSn = board.GP17

##reset
W5x00_RSTn = board.GP20
Be sure to set the pins accordingly.
print("Wiznet5k Loopback Test (DHCP)")
# Setup your network configuration below
# random MAC, later should change this value on your vendor ID
MY_MAC = (0x00, 0x01, 0x02, 0x03, 0x04, 0x05)
IP_ADDRESS = (192, 168, 0, 50)
SUBNET_MASK = (255, 255, 255, 0)
GATEWAY_ADDRESS = (192, 168, 0, 1)
DNS_SERVER = (8, 8, 8, 8)
led = digitalio.DigitalInOut(board.GP25)
led.direction = digitalio.Direction.OUTPUT
ethernetRst = digitalio.DigitalInOut(W5x00_RSTn)
ethernetRst.direction = digitalio.Direction.OUTPUT
Make sure to configure the settings according to your own IP address.
# # Initialize ethernet interface without DHCP
eth = WIZNET5K(spi_bus, cs, is_dhcp=False, mac=MY_MAC, debug=False)
# # Set network configuration
eth.ifconfig = (IP_ADDRESS, SUBNET_MASK, GATEWAY_ADDRESS, DNS_SERVER)
Configure whether to use settings such as DHCP correctly.
Anyway, all the detailed instructions can be found on the WIZnet Git I shared earlier, so you can follow them.
QVGA ILI9341 2.2 TFT SPI 240×320
I refer to the ILI9341 section in the Git I shared earlier. It is explained in detail and easy to understand, so you can implement it easily.

CircuitPython-ILI9341-Examples
It’s educ8s’ Git, since there is no information about the license, you use it. If there is any problem, you can delete it immediately.
Save the data in BMP format and display it on the LCD .
bmp_data = bytearray(buf)
with open ("test.bmp", "wb") as f:
f.write(bmp_data)
group = displayio. Group()
display. show(group)
bitmap = displayio.OnDiskBitmap("/test.bmp")
tile_grid = displayio.TileGrid(bitmap, pixel_shader=bitmap.pixel_shader)
group.append(tile_grid)
Now all that is left is to display the data received from the server on the LCD!
Congratulations, you have completed the project!
