Article directory
- 1. Cube lights up the water lamp
-
- 1.1. Install Cube
- 1.2. New construction
- 1.3. Code writing
- 1.4. Burning program
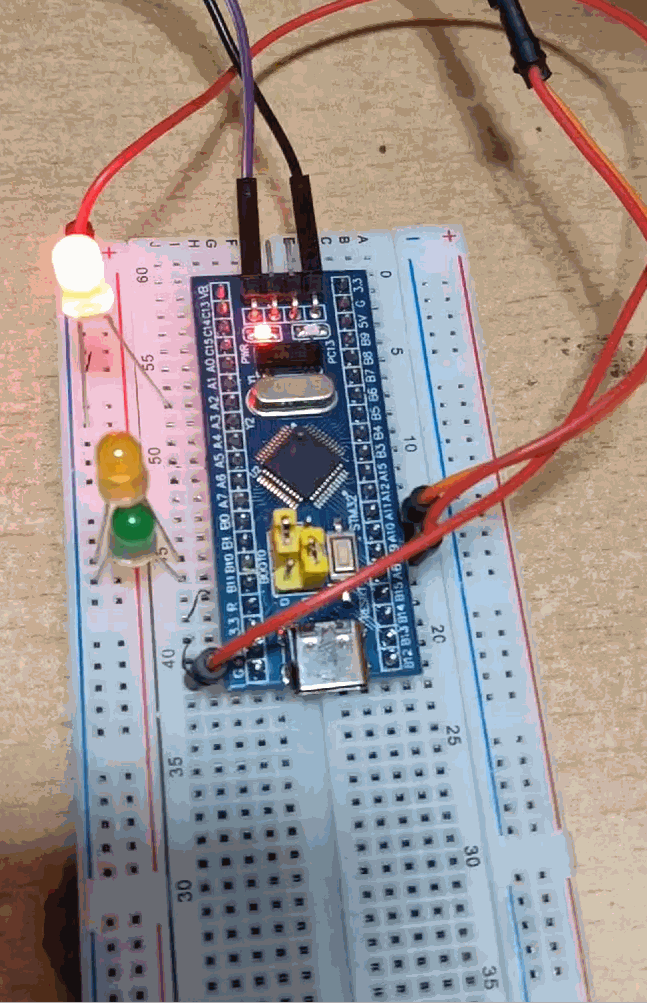
- 1.5. Operation effect
- 2. Interrupt control of running lights
-
- 2.1. New construction
- 2.2. Rewrite the interrupt callback function
- 2.3. Operation effect
- 3. Observe the waveform diagram with an oscilloscope
- 4. Interrupt to control a light to turn on and off
Experimental software: CubeMx, KeilMDK, mcuisp
Experimental pins: PA1, PB1, PB10
Experimental materials: several LEDs, several jumpers, a breadboard, a F103C8T6, a USB to TTL
1. Cube lights up the water lamp
Redo the previous LED running light job, that is, use the GPIO port to complete the periodic flashing of three LED traffic lights.
1.1, Install Cube
For installation tutorial, please refer to: https://blog.csdn.net/as480133937/article/details/98885316
1.2. New construction


Select PA1, PB1, PB10

Configure the clock and enter the rcc above. There are two clocks, one is hse and lse. We want to use the GPIO interface, and these interfaces are in APB2. The APB2 peripherals are controlled by HSE, so set HSE as an external crystal oscillator.

(Why configure it like this?)


Finally click generate

Just write your code in the main.c loop of the generated project file
1.3. Code writing
My code is as follows (using PA1, PB1, PB10):
while (1)
  {<!-- -->
    HAL_GPIO_WritePin(GPIOA, GPIO_PIN_1, GPIO_PIN_SET);
HAL_GPIO_WritePin(GPIOB,GPIO_PIN_1,GPIO_PIN_RESET);
HAL_GPIO_WritePin(GPIOB,GPIO_PIN_10,GPIO_PIN_RESET);
HAL_Delay(1000);
HAL_GPIO_WritePin(GPIOA,GPIO_PIN_1,GPIO_PIN_RESET);
HAL_GPIO_WritePin(GPIOB,GPIO_PIN_1,GPIO_PIN_SET);
HAL_GPIO_WritePin(GPIOB,GPIO_PIN_10,GPIO_PIN_RESET);
HAL_Delay(1000);
HAL_GPIO_WritePin(GPIOA,GPIO_PIN_1,GPIO_PIN_RESET);
HAL_GPIO_WritePin(GPIOB,GPIO_PIN_1,GPIO_PIN_RESET);
HAL_GPIO_WritePin(GPIOB,GPIO_PIN_10,GPIO_PIN_SET);
HAL_Delay(1000);
  }
1.4, Burning program
(Why choose DTR low level to reset and RTS high level to enter BootLoader)

1.5, operation effect
2. Interrupt control of running water lamp
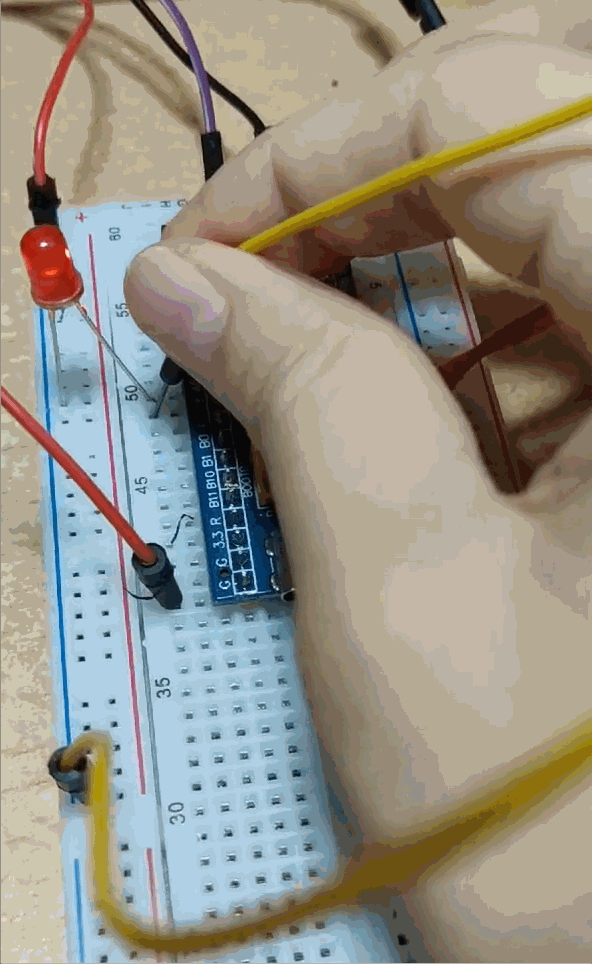
Use a pin on the GPIOA end of the stm32F103 core board to connect a switch (replace it with Dupont wire simulation). Interrupt mode programming is used. When the switch is connected to high level, the LED running water lamp will work; when the switch is connected to low level, the LED running water lamp will stop working.
2.1. New project
It’s almost the same as above, except that you need to select one more pin for interrupt configuration.
Select PA3 as switch


Enable interrupts

2.2. Rewriting the interrupt callback function
void HAL_GPIO_EXTI_Callback(uint16_t GPIO_Pin)
{<!-- -->
  if(GPIO_Pin == SWITCH_Pin){<!-- -->
  //Get the potential of A3. If it is low level, it will keep looping and stop the running water lamp from working.
while(HAL_GPIO_ReadPin(SWITCH_GPIO_Port,SWITCH_Pin)==GPIO_PIN_RESET){<!-- -->}
  }
}
The main loop is still the running water lamp code:
while (1)
  {<!-- -->
    HAL_GPIO_WritePin(GPIOA, GPIO_PIN_1, GPIO_PIN_SET);
HAL_GPIO_WritePin(GPIOB,GPIO_PIN_1,GPIO_PIN_RESET);
HAL_GPIO_WritePin(GPIOB,GPIO_PIN_10,GPIO_PIN_RESET);
HAL_Delay(1000);
HAL_GPIO_WritePin(GPIOA,GPIO_PIN_1,GPIO_PIN_RESET);
HAL_GPIO_WritePin(GPIOB,GPIO_PIN_1,GPIO_PIN_SET);
HAL_GPIO_WritePin(GPIOB,GPIO_PIN_10,GPIO_PIN_RESET);
HAL_Delay(1000);
HAL_GPIO_WritePin(GPIOA,GPIO_PIN_1,GPIO_PIN_RESET);
HAL_GPIO_WritePin(GPIOB,GPIO_PIN_1,GPIO_PIN_RESET);
HAL_GPIO_WritePin(GPIOB,GPIO_PIN_10,GPIO_PIN_SET);
HAL_Delay(1000);
  }
2.3. Operation effect

3. Observe waveforms with an oscilloscope
Without an oscilloscope, you can use Keil’s software simulation logic analyzer function to observe the timing waveforms of the pins, which is more convenient for dynamic tracking and debugging and locating code fault points. Please use this function to observe the output waveforms of the three GPIO port running lights in question 1, and analyze whether the timing status is correct or not, and what the actual high-low level conversion period (LED flashing period) is.
For detailed operations, please view the oscilloscope section in https://blog.csdn.net/wakeup_high/article/details/133828393?spm=1001.2014.3001.5502
Click the magic wand

Click Debug->Logic Analyzer->Configure pins (you can enter PORTX.X directly and press Enter)

Waveform:

It can be seen that the cycle is about 1s, the high-level light is on, and the low-level light is off.
4. Interrupt to control a light to turn on and off
PA4 as LED light
PA5 is a button
The configuration process is similar to the above
Interrupt callback function rewriting:
void HAL_GPIO_EXTI_Callback(uint16_t GPIO_Pin)
{<!-- -->
  if(GPIO_Pin == SWITCH_Pin){<!-- -->
GPIO_PinState pinState = HAL_GPIO_ReadPin(SWITCH_GPIO_Port, SWITCH_Pin);
\t
if(pinState == GPIO_PIN_RESET){<!-- -->
HAL_GPIO_WritePin(GPIOA,GPIO_PIN_4,GPIO_PIN_RESET);
}else{<!-- -->
HAL_GPIO_WritePin(GPIOA,GPIO_PIN_4,GPIO_PIN_SET);
}
  }
}
running result:
refer to:
https://www.cnblogs.com/cqjtu-linzd/articles/17779241.html#3-Interrupt mode control running water lamp