VsCode uses Git to upload code to GitHub
1. Software installation
1. Install Git
2. Install VsCode
For specific installation methods of Git, see Git download and installation.
VsCode can be installed directly. I won’t go into details here.
2. Create an empty warehouse/project on GitHub
1. Log in to your account on the GitHub login interface. After entering the GitHub homepage, click the “+” sign in the upper right corner and select New repository to create a new project.

2. In the new interface, enter the project name, and other defaults will be sufficient (the description is optional). As shown in the figure, click Create repository at the bottom to create a new project.

3. After the creation is successful, the interface that pops up displays some basic information and basic Git operations to facilitate testing of git cloning. We need to create a new file in the project, click on the blue font below to generate a readme.md document
You can also directly check the Add a README file button when creating a new project, then a readme file can be generated while creating a new project.

4. Enter the information in the new pop-up interface, and then click Create at the bottom.

5. The file is generated as shown in the figure below

3. Settings required for the first installation of Git
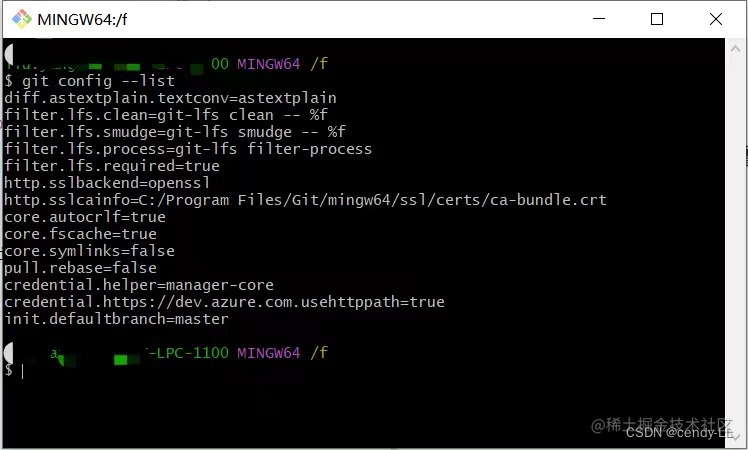
1. View my git configuration list
Right-click Git Bash Here to pop up the git command line terminal. Enter the command: git config –list. The current git configuration content will appear on the command line, as shown below.
2. Configure global user name
Enter the command on the terminal command line: git config –global user.name “your username”
3. Configure global mailbox
Enter the command on the terminal command line: git config –global user.email “your email”
Note: The user name and email address set should be consistent with those in GitHub.
4. Link to GitHub through HTTPS protocol
Method 1-Clone code from GitHub repository
1. Clone the code from the GitHub repository
(1) Open VsCode, press the shortcut key “ctrl + shift + P”, then enter git and select clone

(2) An input box pops up, prompting us to enter the URL address of the repository. We can directly copy and paste the HTTPS address of the repository in GitHub.


(3) After entering the repository URL address for confirmation, we will be asked to select the local location to be cloned. Just select the folder where you put the project (no Chinese required). After confirmation, start cloning, as shown in the figure.

(4) After cloning is completed, the following interface will appear. Just select Open. At the same time, the cloned content already exists in the corresponding project folder.


2. Modify the code locally
After opening the project, we see the picture below. Click on folder management and the code we cloned will pop up. Select the README.md file and you can see the corresponding file content. Make some modifications to the file and save it for the next step. Test if you can post back to GitHub.
After saving the file, you can see a blue 1 icon appearing on the left. Click it to enter the Git management interface.

3. Git version management
(1) After entering the Git management interface, you can see that there has been a change. The letter M after the file indicates that the file has been changed, which means modified. Click on the file, as shown in the figure below, you can see that we have changed the file. The changes are some additions.

(2) Click the + sign on the left side of the icon M, and you will see the following picture, indicating that we have temporarily saved the changes, but have not yet submitted them.


(3) Follow the prompts and fill in the information at the arrow. The information here is the submitted remarks. Here you can write what has been repaired. After writing, click √ in the upper right corner to submit.

(4) After the submission is completed, the modification has been successful and the code has been submitted to the local warehouse. Next we need to submit the code to the remote warehouse.
4. Upload from local warehouse to GitHub remote warehouse
Click the arrow in the picture below. If a login window appears, fill in the information according to specific needs.


5. View changes in the GitHub remote repository
(1) The code has been modified
(2) The remark information is displayed as the information we filled in when submitting

Method 2-Use VSCode terminal to submit
Submitting code to Github from the terminal requires two steps: Submitting to the local warehouse -> Submitting from the local warehouse to the remote warehouse
1. Submit to local warehouse
(1) The first choice is to create a local warehouse, that is, right-click to create an empty folder, then open the terminal in VSCode, enter the currently created empty folder, and initialize the local warehouse. After that, a .git file will appear in the empty folder. Clip, as shown below:
Local warehouse initialization:
    git init


(2) Next, add some files to the current folder for test submission.

(3) Now let’s perform the submission operation-submit a single file step
Submit a single file:
    git add readme.txt
    git commit -m "First submission readme"

Submit all documents:
    git add .
    git commit -m "Commit all"

2. Submit to the remote warehouse
After the local warehouse is submitted, the content needs to be submitted to the remote warehouse, as shown in the figure:
Submit the remote warehouse:
    git remote add origin https://github.com/LL-Elsie/git_test.git
    git remote set-url origin https://github.com/LL-Elsie/git_test.git
    git branch -M test1
    git push -u origin test1

In this way, a new test1 branch is created in the git_test remote warehouse, and all files in the local git_test are pushed to the test1 branch in the git_test warehouse.

Common git commands
git branch------------------View the current branch
git checkout -b main--------Create a new main branch in the current warehouse and switch to this branch.
git branch -M main----------Create a new main branch
git checkout main-----------switch to the main branch
5. Use git to upload code to Github (content already exists in the remote warehouse)
1. There are content updates under this warehouse, as shown in the figure, open the terminal and use git to upload

2. Enter the command in the terminal, submit all files to the local warehouse, and then submit them to the remote warehouse. After submitting the remote warehouse, an error message will appear: error: remote origin already exists., as shown below
Submit all files to the local warehouse
git add .
git commit -m "Commit all"
git remote add origin https://github.com/LL-Elsie/Practice.git

3. This error message appears, which is translated as (fatal: the remote source already exists). At this time, we can first check the remote library information with git remote -v
View remote library information
git remote -v

4. If this problem occurs, it means that the remote warehouse already exists, so we can delete it first and then link it. The solution is as follows:
Delete remote repository
    git remote rm origin
Add remote repository to branch
    git remote add origin https://github.com/LL-Elsie/Practice.git
Resend
    git push origin master


Note: If the following error message appears when pushing code to a remote warehouse: the remote end hung up unexpectedly, it is because the size of the pushed code exceeds the default range of git. You can adjust the maximum value of git pushed code.

Solution:
Find the config file in the .git folder under the local warehouse, open the config file, change the postBuffer to 1024mb, then push again, and the code can be successfully pushed to the remote warehouse.
[http]
postBuffer = 1024288000

