Start building
1. Create project
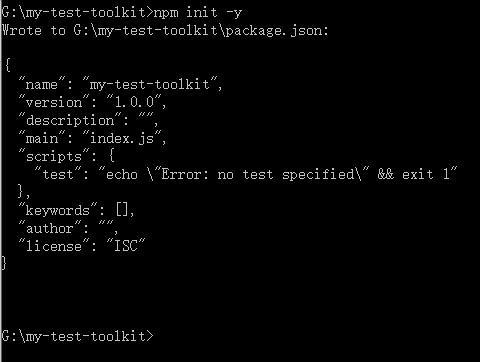
Let’s find a place to create a new directory, name it “my-test-toolkit”, and then use the terminal in the directory to run npm init -y to generate the project configuration file< strong>package.json.
2. Installation tools
Then we will install Selenium and Nightwatch.
-
Install selenium-standalone:
-
npm install selenium-standalone --save-dev
-
-
Install Nightwatch:
-
npm install nightwatch --save-dev
-
Project configuration
We first start configuring Nightwatch. As mentioned before, this is a Test Runner. It is responsible for reading our test scripts, providing us with APIs to operate the browser, and helping us control Selenium.
1. Configure Nightwatch
-
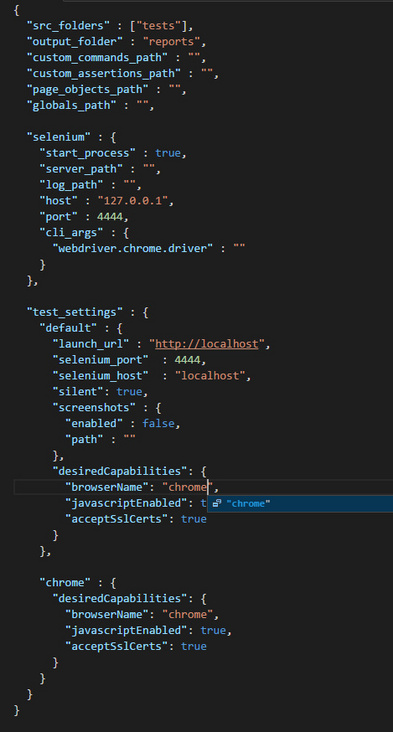
First, create the file “nightwatch.json” in the project root directory. This file is used to store Nightwatch configuration information. After creation, write the following content in the file:
{
     "src_folders": ["tests"],
     "output_folder": "reports",
     "custom_commands_path": "",
     "custom_assertions_path": "",
     "page_objects_path": "",
     "globals_path": "",

     "selenium": {
       "start_process": true,
       "server_path": "",
       "log_path": "",
       "host": "127.0.0.1",
       "port": 4444,
       "cli_args": {
         "webdriver.chrome.driver": ""
       }
     },

     "test_settings": {
       "default": {
         "launch_url": "http://localhost",
         "selenium_port": 4444,
         "selenium_host": "localhost",
         "silent": true,
         "screenshots": {
           "enabled": false,
           "path": ""
         },
         "desiredCapabilities": {
           "browserName": "firefox",
           "javascriptEnabled": true,
           "acceptSslCerts": true
         }
       },

       "chrome" : {
         "desiredCapabilities": {
           "browserName": "chrome",
           "javascriptEnabled": true,
           "acceptSslCerts": true
         }
       }
     }
}
The file name of nightwatch.json cannot be modified, because Nightwatch reads the configuration from it every time it is started! There are many configuration items here, but let’s ignore it for now and let’s create the file. If you want to see the detailed configuration of Nightwatch
Then create the file “nightwatch.conf.js” in the project root directory. This file name cannot be modified because Nightwatch will also read the configuration from it every time it is started~ (′?_?`)
After creation, open the file and write the following content:
const path = require('path')

module.exports = (function (settings) {
      return settings;
})(require('./nightwatch.json'))

/*
 * Nightwatch will read configuration from nightwatch.json.
 * However, if nightwatch.conf.js exists, the configuration will be read from the latter first.
 * The purpose of nightwatch.conf.js is to use JavaScript to dynamically generate configuration information.
 * If the configuration information does not require code modification, just use nightwatch.json directly.
 */
Create the file “startup.js” in the project root directory again, and then write inside the file:
require('nightwatch/bin/runner.js')
This file is the entry file for our test. In the future, if we want to execute the test, we must run this file. The command is node ./startup. The name of the entry file can be changed according to preference, just run it. However, it is too troublesome to enter node ./startup every time, so we write this command into npm scripts ~~~ Open “package.json”, create the “script” attribute in the JSON object, and write the content:
{
    ...
    "scripts": {
        "start": "node ./startup.js"
    },
    ...
}
In the future, every time you run a test, just execute npm start in the project root directory! (?)
The configuration of Nightwatch has come to an end for the time being (actually, I will come back soon…), let’s deal with Selenium next.
2. Configure Selenium
Selenium is an automated testing environment. It provides functions such as testing servers, starting browsers, and automatic web page operations. It also exposes APIs to Nightwatch for our use.
We will next tell Nightwatch where our Selenium is installed, where the Driver program for starting the browser is, and then create Selenium installation scripts and manual startup scripts for emergencies ~~
Driver is the program that tells Selenium to open the browser installed on your system.
-
1. Create Selenium configuration information.
Create the folder “build” in the project root directory, create the file “selenium-conf.js” in it, and write the following information:
const process = require('process')

module.exports = {
    // Selenium version configuration information. Please check the link below for the latest version. To upgrade the version, you only need to modify the version number.
    // https://selenium-release.storage.googleapis.com/index.html
    selenium: {
        version: '2.53.1',
        baseURL: 'https://selenium-release.storage.googleapis.com'
    },

    // Driver is used to start the browser installed in the system. Selenium uses Firefox by default. If you do not need to use other browsers, you do not need to install an additional Driver.
    //Here we install the Chrome driver so that we can use Chrome for testing.
    driver: {
        chrome: {
            // Chrome browser starts Driver, please check the latest version at the link below.
            // https://chromedriver.storage.googleapis.com/index.html
            version: '2.22',
            arch: process.arch,
            baseURL: 'https://chromedriver.storage.googleapis.com'
        }
    }
}
This configuration information includes Selenium body configuration and Driver configuration. We will dynamically load these configurations later. The purpose of this document is to better manage Selenium versions.
2. Tell Nightwatch where my Selenium and Driver are.
Open the “nightwatch.conf.js” file in the project root directory again and edit it like this:
const seleniumConfig = require('./build/selenium-conf')
const path = require('path')

module.exports = (function (settings) {

    // Tell Nightwatch where my Selenium is.
    settings.selenium.server_path = `${path.resolve()}/node_modules/selenium-standalone/.selenium/selenium-server/${seleniumConfig.selenium.version}-server.jar`

    // Set up the Chrome Driver so that Selenium has the ability to open the Chrome browser.
    settings.selenium.cli_args['webdriver.chrome.driver'] = `${path.resolve()}/node_modules/selenium-standalone/.selenium/chromedriver/${seleniumConfig.driver.chrome.version}-${seleniumConfig .driver.chrome.arch}-chromedriver`

    return settings;
})(require('./nightwatch.json'))
We have added two new lines of configuration, their functions are as shown in the comments.
3. Create a Selenium installation script and install Selenium with one click.
Remember in the last chapter we mentioned that selenium-standalone is just a tool used to install and manage Selenium? So now it’s time to use it to install Selenium. We will implement automatic installation by calling the built-in method of selenium-standalone. Create the file “selenium-setup.js” in the “build” folder and write the following information:
const selenium = require('selenium-standalone')
const seleniumConfig = require('./selenium-conf.js')

selenium.install({
    version: seleniumConfig.selenium.version,
    baseURL: seleniumConfig.selenium.baseURL,
    drivers: seleniumConfig.driver,
    logger: function (message) { console.log(message) },
    progressCb: function (totalLength, progressLength, chunkLength) {}
}, function (err) {
    if (err) throw new Error(`Selenium installation error: ${err}`)
    console.log('Selenium installation completed.')
})
Also for convenience, we write the installation command into npm scripts:
{
    ...
    "scripts": {
        "start": "node ./startup.js",
        "selenium-setup": "node ./build/selenium-setup.js"
    },
    ...
}
Then execute npm run selenium-setup in the project root directory to install Selenium.
When prompted that the installation is complete, everything is ready! (?)
Selenium and its Driver will be installed in “node_modules/selenium-standalone/.selenium”.
4. Want to start Selenium manually?
By default, Selenium is started by Nightwatch and does not require manual intervention, but of course it is possible if you want to start it manually.
Create the file “selenium-start.js” in the build folder and write the following information:
const selenium = require('selenium-standalone')
const seleniumConfig = require('./selenium-conf.js')

selenium.start({
    drivers: seleniumConfig.driver
}, function (err, child) {
    if (err) throw new Error(`Selenium startup failed: ${err}`)
    console.log(`Selenium has been started manually, process PID: ${child.pid}`)
    console.log('This PID process can be shut down when it is no longer needed to run Selenium.')
})
Then also add the startup command to npm scripts:
{
    ...
    "scripts": {
        "start": "node ./startup.js",
        "selenium-setup": "node ./build/selenium-setup.js",
        "selenium-start": "node ./build/selenium-start.js"
    },
    ...
}
-
In the future, you can use the command
npm run selenium-startto start Selenium manually.
Construction completed!
At this point, our configuration and installation work has been completed, and the project structure should be:
>
| -- build
| | -- selenium-conf.js # Selenium version information configuration.
| | -- selenium-setup.js # Selenium installation command script.
| | -- selenium-start.js # Selenium startup command script.
|
| -- nightwatch.conf.js # Nightwatch dynamic configuration file.
| -- nightwatch.json # Nightwatch configuration file.
| -- package.json #Project information configuration file.
| -- startup.js # Test startup entry file.
“But I seem to see that the configuration of “nightwatch.json” is very complicated, but we really haven’t touched it much?”
Hmm~~ There is really not much that needs to be changed so far, but there is still one configuration item that needs to be paid attention to:
- Please pay attention to the “browserName” item under “desiredCapabilities”. This is the browser that will be used during the test. You can modify it to chrome, internet explorer, or phantomjs. In the introduction of this article, only Chrome’s Driver is installed. If you need to use other browsers The corresponding driver must be installed before it can be used normally.
- The default browser is Firefox. If you use Firefox, no additional driver configuration is required.
- So, if you need to use Chrome, please change “browserName” to “chrome”!
Driver’s documentation
If you encounter difficulties during the construction process, you can get the Start Kit that has been built below from Github.
Start writing test cases
Create a directory to store test cases
Create a new directory named “tests” in the project root directory, and then use it here to store the test case files we are about to write.
So can this folder be pointed to other places? Of course you can, but you need to modify a small place.
Remember the ” nightwatch.json ” file? Open it and see if the first item is called src_folders and the value is [“tests”]?
I believe you already understand, here is where you define the directory where test cases are stored, and then change it to the directory you want!
You can store multiple test case files in the directory and name them arbitrarily. Nightwatch will read all JS files in the directory and execute them automatically if they match the test case format.
Write a simple test case
Create a test case file “demo.js” in the “tests” directory, and then let’s write a useless little demo!
This demo will open Bing, search for “what is microsoft”, save it as a screenshot and exit.
OK, open “demo.js” and add the following content:
module.exports = {
  'Find the answer.': function (client) {
    // TODO...
  }
}
module.exports exports an object. The Key of the object is the test case name. You can write multiple test cases and Nightwatch will execute them in sequence.
You can import other modules in test cases and use them directly in test logic, which is also better than Phantom.JS.
Having written this first, you may be unfamiliar with cilent, so I would like to briefly introduce it.
client is the object provided by Nightwatch when the code is running. All operations performed on the browser will be called using this object, such as client.click(“CSS Selector”), client.getCookie(function () {…}), What we said in the first chapter “can be simply understood as Selenium’s control software” is reflected through it!
All APIs of client
After roughly understanding the meaning of this thing, you can then improve the test logic:
module.exports = {
  'Find the answer.': function (client) {
    // Define nodes in the Bing page.
    const searchInput = '#sb_form_q'
    const searchBtn = '#sb_form_go'
    const question = 'what is microsoft'

    // Start the browser and open bing.com.
    client.url('http://bing.com').maximizeWindow()

    // Make sure "body" and input fields are available.
    client.expect.element('body').to.be.present
    client.expect.element(searchInput).to.be.visible
    client.pause(2000) // Wait two seconds.

    // Type "what is microsoft" and search.
    client.setValue(searchInput, question)
    client.click(searchBtn)
    client.pause(2000)

    // Take a screenshot and save it to "reports/answer.png".
    client.expect.element('body').to.be.present
    client.saveScreenshot('reports/answers.png')
    client.end()
  }
}
Let’s pay attention to expect. Does it look like natural language? These statements are the verification statements of the test results, which are the results we hope to get. For example, client.expect.element(‘body’).to.be.present.before(3000) means “I hope the body element can be initialized within 3000 milliseconds.”
Nightwatch supports BDD-Style and Assert assertion styles.
For more information about Assert, BDD, and TDD, please refer to other articles.
Is it really useless? After all, it’s just a simple demo, haha. Then add a slightly more complex test case.
Write another simple test case
This demo opens Bilibili and then executes:
- Open the homepage and wait for it to load;
- Check if the login button exists;
- Click the login button;
- Fill in the username and password;
- Click to log in;
- Wait for the page to load;
- Check whether you are logged in through cookies;
- Ensure that the user navigation panel after login exists;
- Move the mouse to the avatar to open the navigation panel;
- Click to log out;
- Wait for the page to refresh and then check whether Cookie has logged out;
- End the test.
In fact, this is what the Demo picture in Chapter 1 does (?) This demo is no longer verbose and just releases the code:
// Account setting.
const accountConfig = {
  username: 'USERNAME',
  password: 'PASSWORD',
  uid: '10000'
}

module.exports = {
  'Bilibili Live Login Test': function (client) {
    client.url('http://live.bilibili.com').maximizeWindow()

    // Page Init.
    client.expect.element('body').to.be.present.before(3000)
    client.expect.element('.top-nav-login-btn.last').to.be.visible

    // Login.
    client.click('.top-nav-login-btn.last')
    client.waitForElementVisible('#bilibili-quick-login', 2000)
    client.frame(0)
    client.pause(2000)
    client.setValue('#login-username', accountConfig.username)
    client.setValue('#login-passwd', accountConfig.password)
    client.click('#login-submit')

    // Wait and check page has been reloaded.
    client.frameParent()
    client.pause(4000)
    client.expect.element('body').to.be.present.before(3000)

    // Check cookies to ensure we are signed in.
    client.getCookies(function (result) {
      result.value.forEach((value, index, array) => {
        if (value.name === 'DedeUserID') client.assert.equal(parseInt(value.value, 10), accountConfig.uid)
      })
    })

    // Move to User Avatar.
    client.expect.element('.user-avatar-link').to.be.visible
    client.moveToElement('.user-avatar-link', 5, 5)
    client.pause(800)
    client.expect.element('#top-nav-user-panel').to.be.visible

    // Logout.
    client.click('#top-nav-logout-link')
    client.pause(5000)
    client.expect.element('body').to.be.present.before(3000)

    // Check cookies again to ensure we are off.
    client.getCookies(function (result) {
      var logout = true
      result.value.forEach((value, index, array) => {
        if (value.name === 'LIVE_LOGIN_DATA') logout = false
      })
      client.assert.equal(logout, true)
    })

    client.pause(1000)
    client.end()
  }
}
You can create a new file or continue writing in a previous file.
Run test case
Go back to the project root directory, execute npm start, and then you can see the browser testing itself!
The running effect is as follows:
After the test is run, the test results will be printed in the terminal and generated in the reports folder.
You can modify “output_folder” in nightwatch.json to change the report generation directory.
Points to note
You may encounter problems during use, such as “you clearly see that the node is missing and cannot be obtained”, “the mouse function seems to be good and bad”, etc. Here are some suggestions for you:
- Since many websites are now built using frameworks such as Angular and Vue, their nodes may be dynamically rendered for components. Therefore, the Dom tree obtained by Selenium when executing the test may be old data and the node cannot be found. Therefore, you can execute a wait statement to ensure that the node Test again after it appears. However, it may not be 100% successful, which is also one of the shortcomings of this test system.
- If you are testing that simulates a mouse, your mouse pointer may interfere with your tests, so it is recommended to move your pointer outside the screen after running the test to avoid interfering with browser tests.
- It is possible that the test will fail due to page load time issues, but this is also a characteristic of E2E testing. You can modify your test logic or work on improving the load time.
You’re done!
Now you have your own testing tool and have successfully written two test cases! You should give yourself a pat on the back here!
You can now incorporate E2E testing into your development process. I believe this will be of great help to your development. If you are interested, you can also consider the possibility of unit testing.
At the same time, as mentioned before, if you are using Vue to build your project, you can use Vue-cli to generate a Vue seed project that already contains Selenium and Nightwatch, and you can write your test cases in test/e2e.
Thank you to everyone who read my article carefully. Reciprocity is always necessary. Although it is not a very valuable thing, if you can use it, you can take it directly:
This information should be the most comprehensive and complete preparation warehouse for [software testing] friends. This warehouse has also accompanied tens of thousands of test engineers through the most difficult journey. I hope it can also help you!Yes Friends who need it can click on the small card below to get it
