Table of Contents
Step 1: Download the model and modify parameters
Step 2: Label the data
Step 3: Start training
Step 4: Convert yolov5 to tfLite model
Step 5: We can check whether tfLite is available
Step 6: Download the official sample code
Step 7: Modify the code
Step 8: Run the software
Step 9: Optimize Speed
renderings
Reference: [Selected] Teach you step by step how to use YOLOV5 to train your own target detection model-mask detection-video tutorial_yolov5 training model_Si Twelve’s blog-CSDN blog
Model download address:
YOLOV5-mask-42: Mask detection system based on YOLOV5 – teaching video provided (gitee.com)
What I used was to convert the yolov5 model into a tfLite model and then embed it into Android.
For the creation of conda environment, you can see the reference at the top. The boss has explained how to create the environment in detail.
The first step: download the model and modify the parameters
After downloading the model, change the following files according to our needs 

Both train and val are the paths of data set images. The data set does not need to be included in the project, but the format of the path is best


After changing it to our own path, change here (nc) to the format of our own target object, (names) and the naming of the target

It is important to note the ordering of goals here, and you must remember them well.
Step 2: Label data
Enter at the command line
pip install labelImg

After installation, enter
labelImg
Start labelImg

The location of the data picture is


Note here that in the annotation file, the class file will be automatically generated with our first annotation target.

As we annotate, the corresponding txt file will also appear.


Each txt contains the category of the image and the target location.
And this order is exactly the target order written manually when we modify mask_data. These two places must correspond.

When annotating pictures, we will find that every time we reopen the annotation application, it will not recognize our own class file, but will re-create it for us, and the order is the order of annotation after we reopen the application. This will cause the content of the class file to be replaced, causing confusion in the labeling data. Sometimes it will crash for this reason, so we can create the class file in advance in the labels folder and arrange it in our customized order.
Then when starting labelImg
enter
Labelimg class_file E:\StudyData\python\TrafficData\labels\text\classes.txt
In this way, the annotation application will recognize your class file.
After we have labeled all the data, each picture will correspond to a label file in labels
After we have labeled our own data set, we can start training
Step 3: Start training

Find the train file and find the information at this location. What is demonstrated here is the pre-training model of yolov5m.
Here –data, be careful not to write it as mask_data2.yaml like me, the default is mask_data.yaml

If running on GPU, change this to 0
After modifying these things, you can enter
python train.py --epoch 100 --batch-size 8
Then wait for the model to finish running Because of how to run the model, other bloggers have already published relevant tutorials. Here is a simple implementation. You can refer to others for specific details. Here I will mainly share how I converted to tfLite and successfully implemented the yolov5 model. of conversion
Step 4: Convert yolov5 to tfLite model
When our model is finished running

You can see this file in runs/train/exp*/weights/best.pt. This is the result we ran;
You can test it in window.py written by the boss


Then run directly

Pass in our own data


As you can see, the model has been successfully run.
The next step is to start the conversion
Open export.py


After the modification is completed, run export directly
Wait for a while for his automatic conversion
Conversion successful

You can see that a tfLite file has been generated in our project

Step 5: We can check whether tfLite is available
Get the output data details of the tflite model
Enter python in the command line


Here you can see that the model successfully inputs information
python

>>> import tensorflow as tf
>>> yolov5s = "runs/train/exp17/weights/best-fp16.tflite"
>>> interpreter = tf.lite.Interpreter(model_path = yolov5s)
>>> yolov5s = "runs/train/exp17/weights/best-fp16.tflite"
>>> interpreter = tf.lite.Interpreter(model_path = yolov5s)
>>> print(interpreter.get_output_details())
The corresponding commands are:

Reference: 4. tflite export, model details_bilibili_bilibili
Step 6: Download the official sample code
After the model conversion is successful, we can embed tfLite. Here we can download the case
https://github.com/yyccR/yolov5-tflite-android
After correctly downloading and importing into android studio

We can see that there are many models in the sample application. We can put our own models here.

Step 7: Modify the code
Click on this coco_label.txt file, we can see that it is where the target is stored.
So what we need to do is
1. Add model
2. Create coco_label.txt file

Here I directly create a coco_label2.txt and put our previous class file directly into
The next step is to open

Modify model


Here we just modified the default model. For details, you can study the code yourself and modify it.
Here we go back and check the input information of our tfLite model

can be seen

What we need is a picture size of 640,640; so in the project, we also need to modify the INPNUT_SIZE here
 Before modification
  After modification
Then take a look
What this represents is OUTPUT_SIZE, so we still need to modify it


Then modify label_file


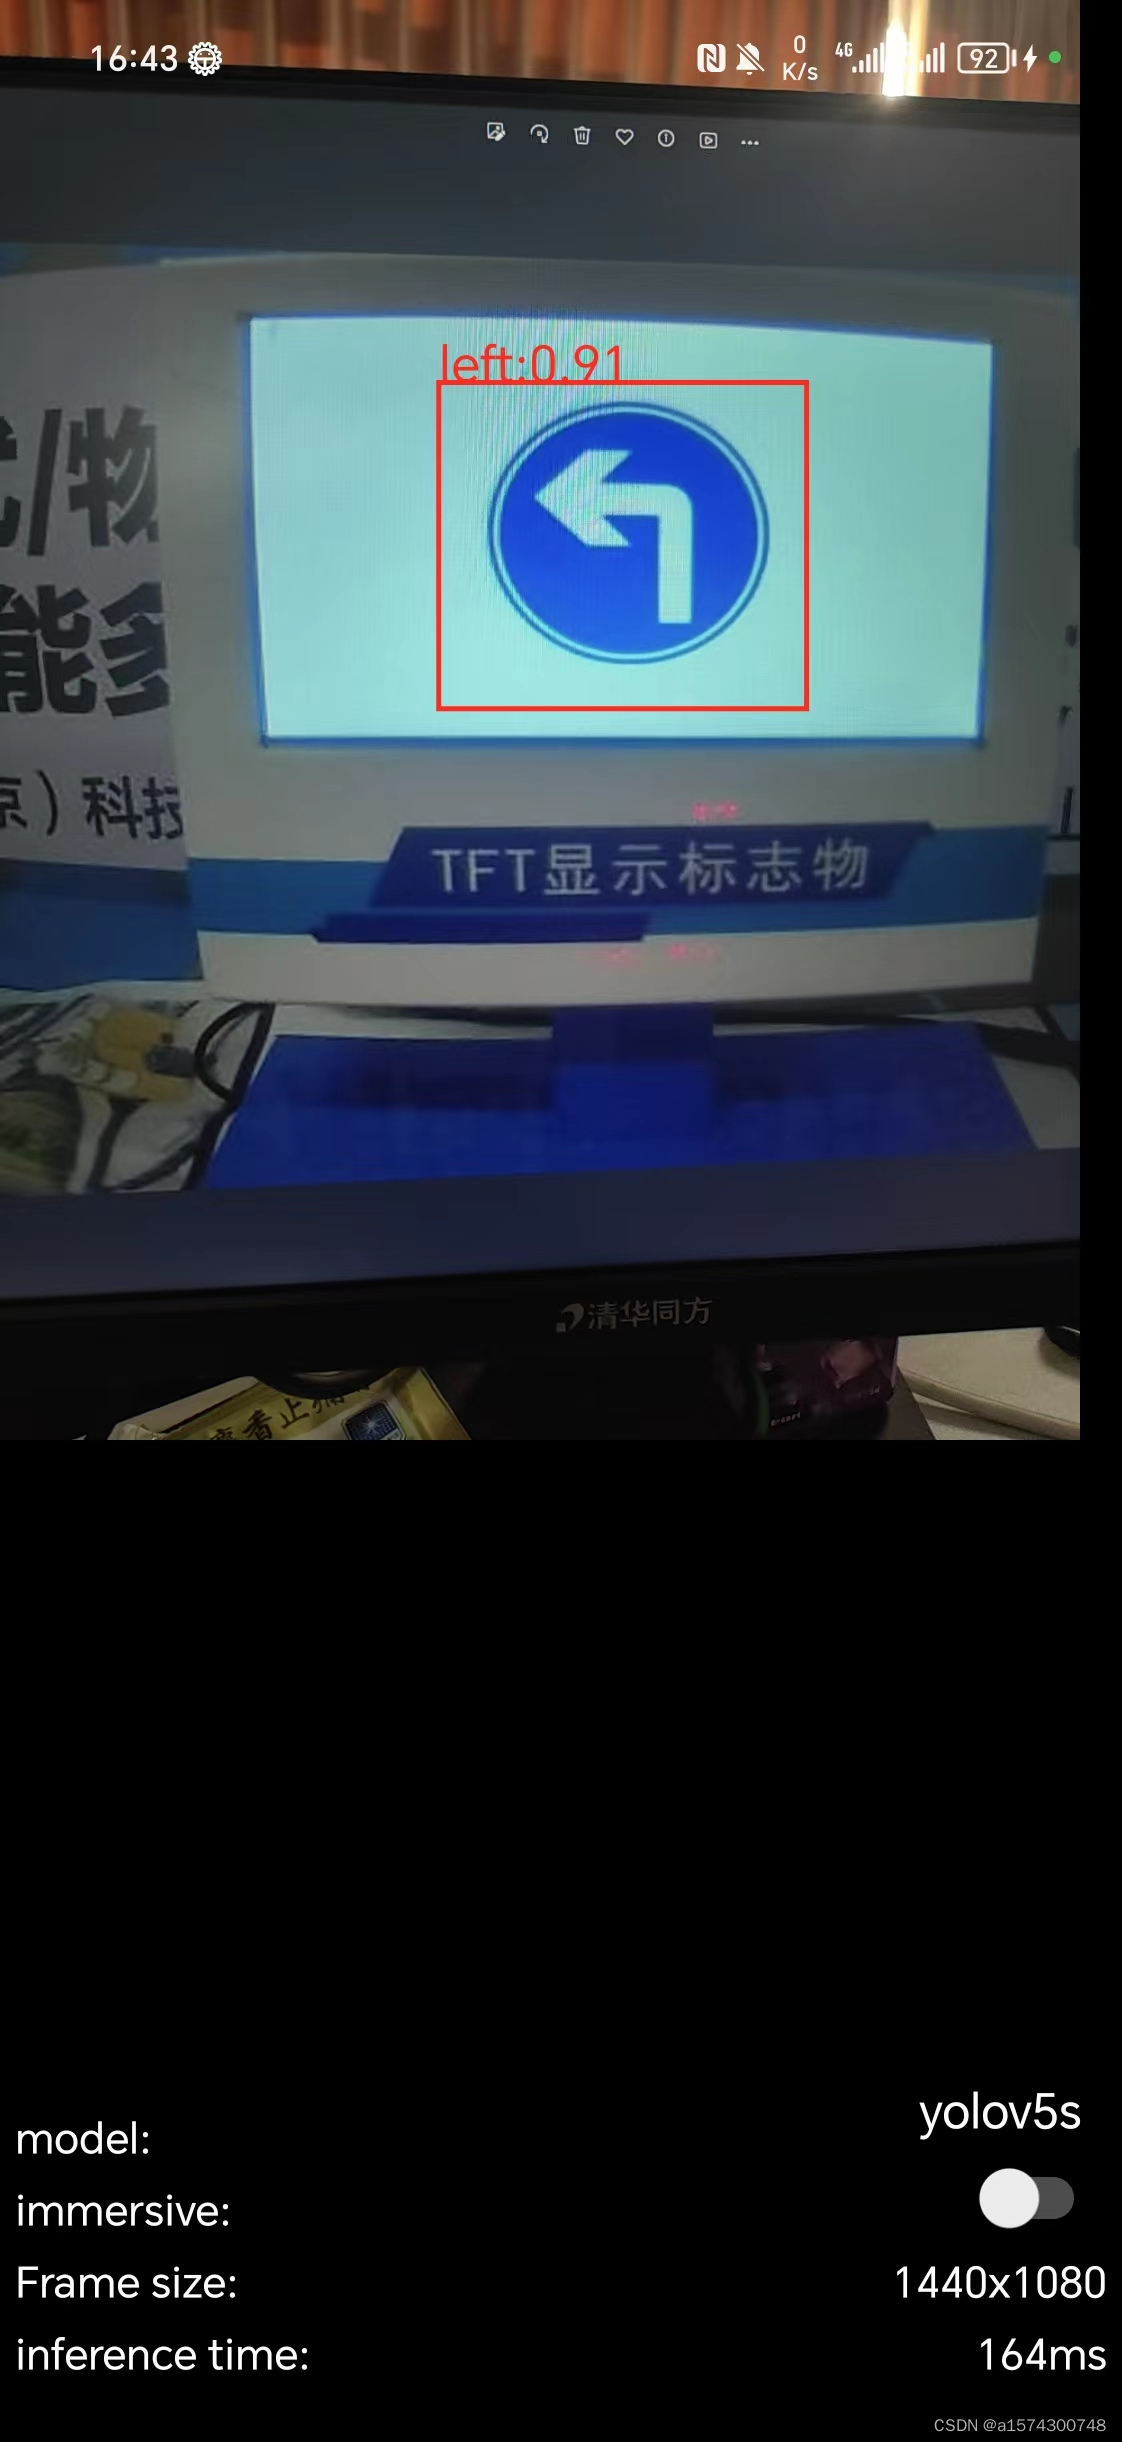
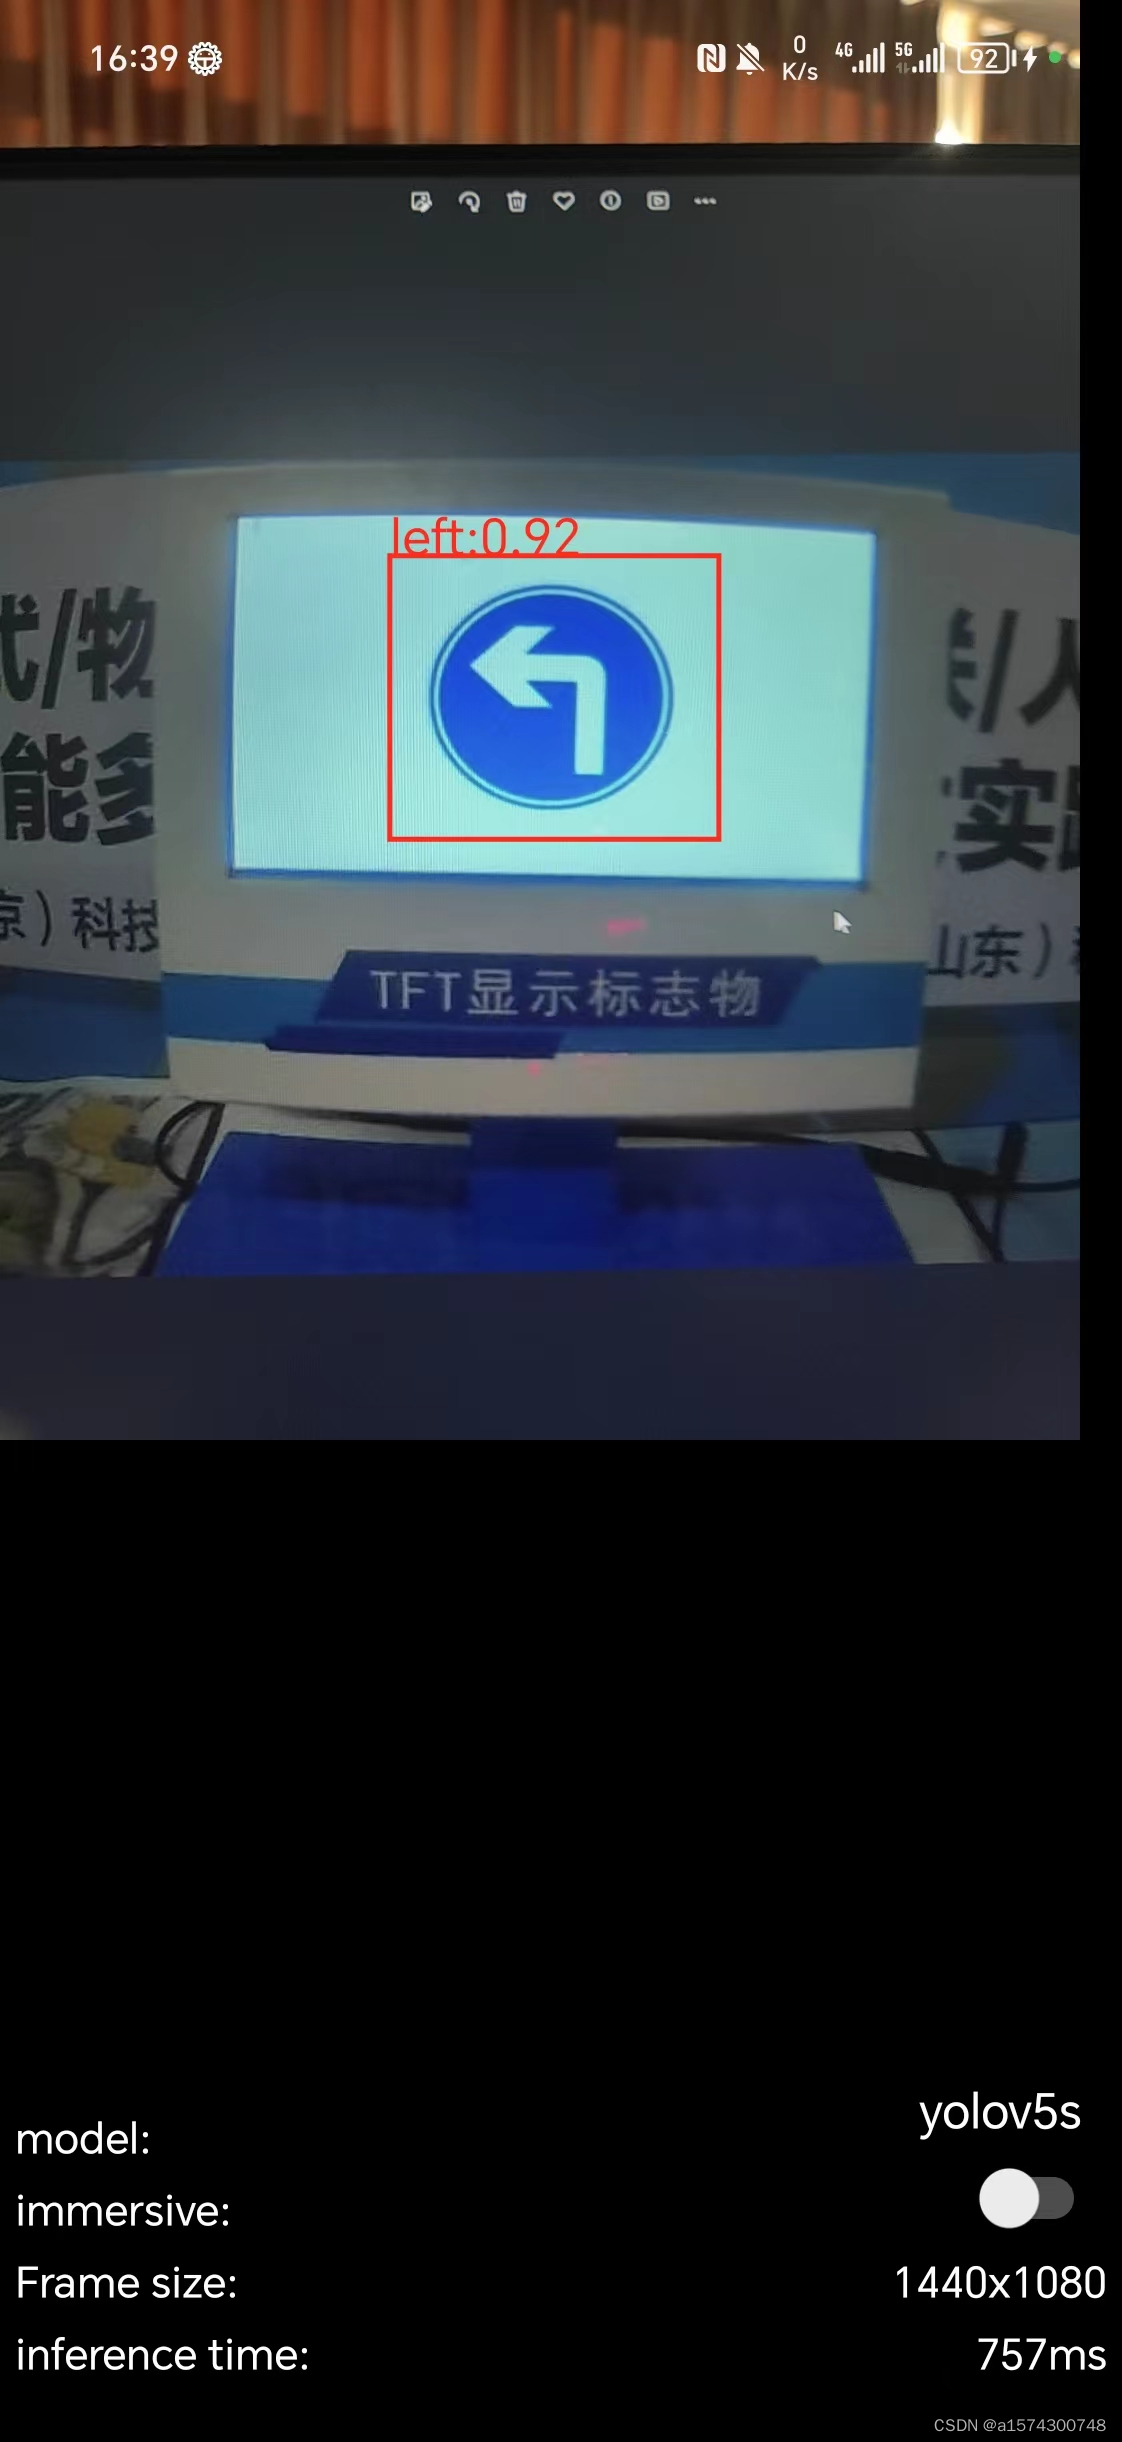
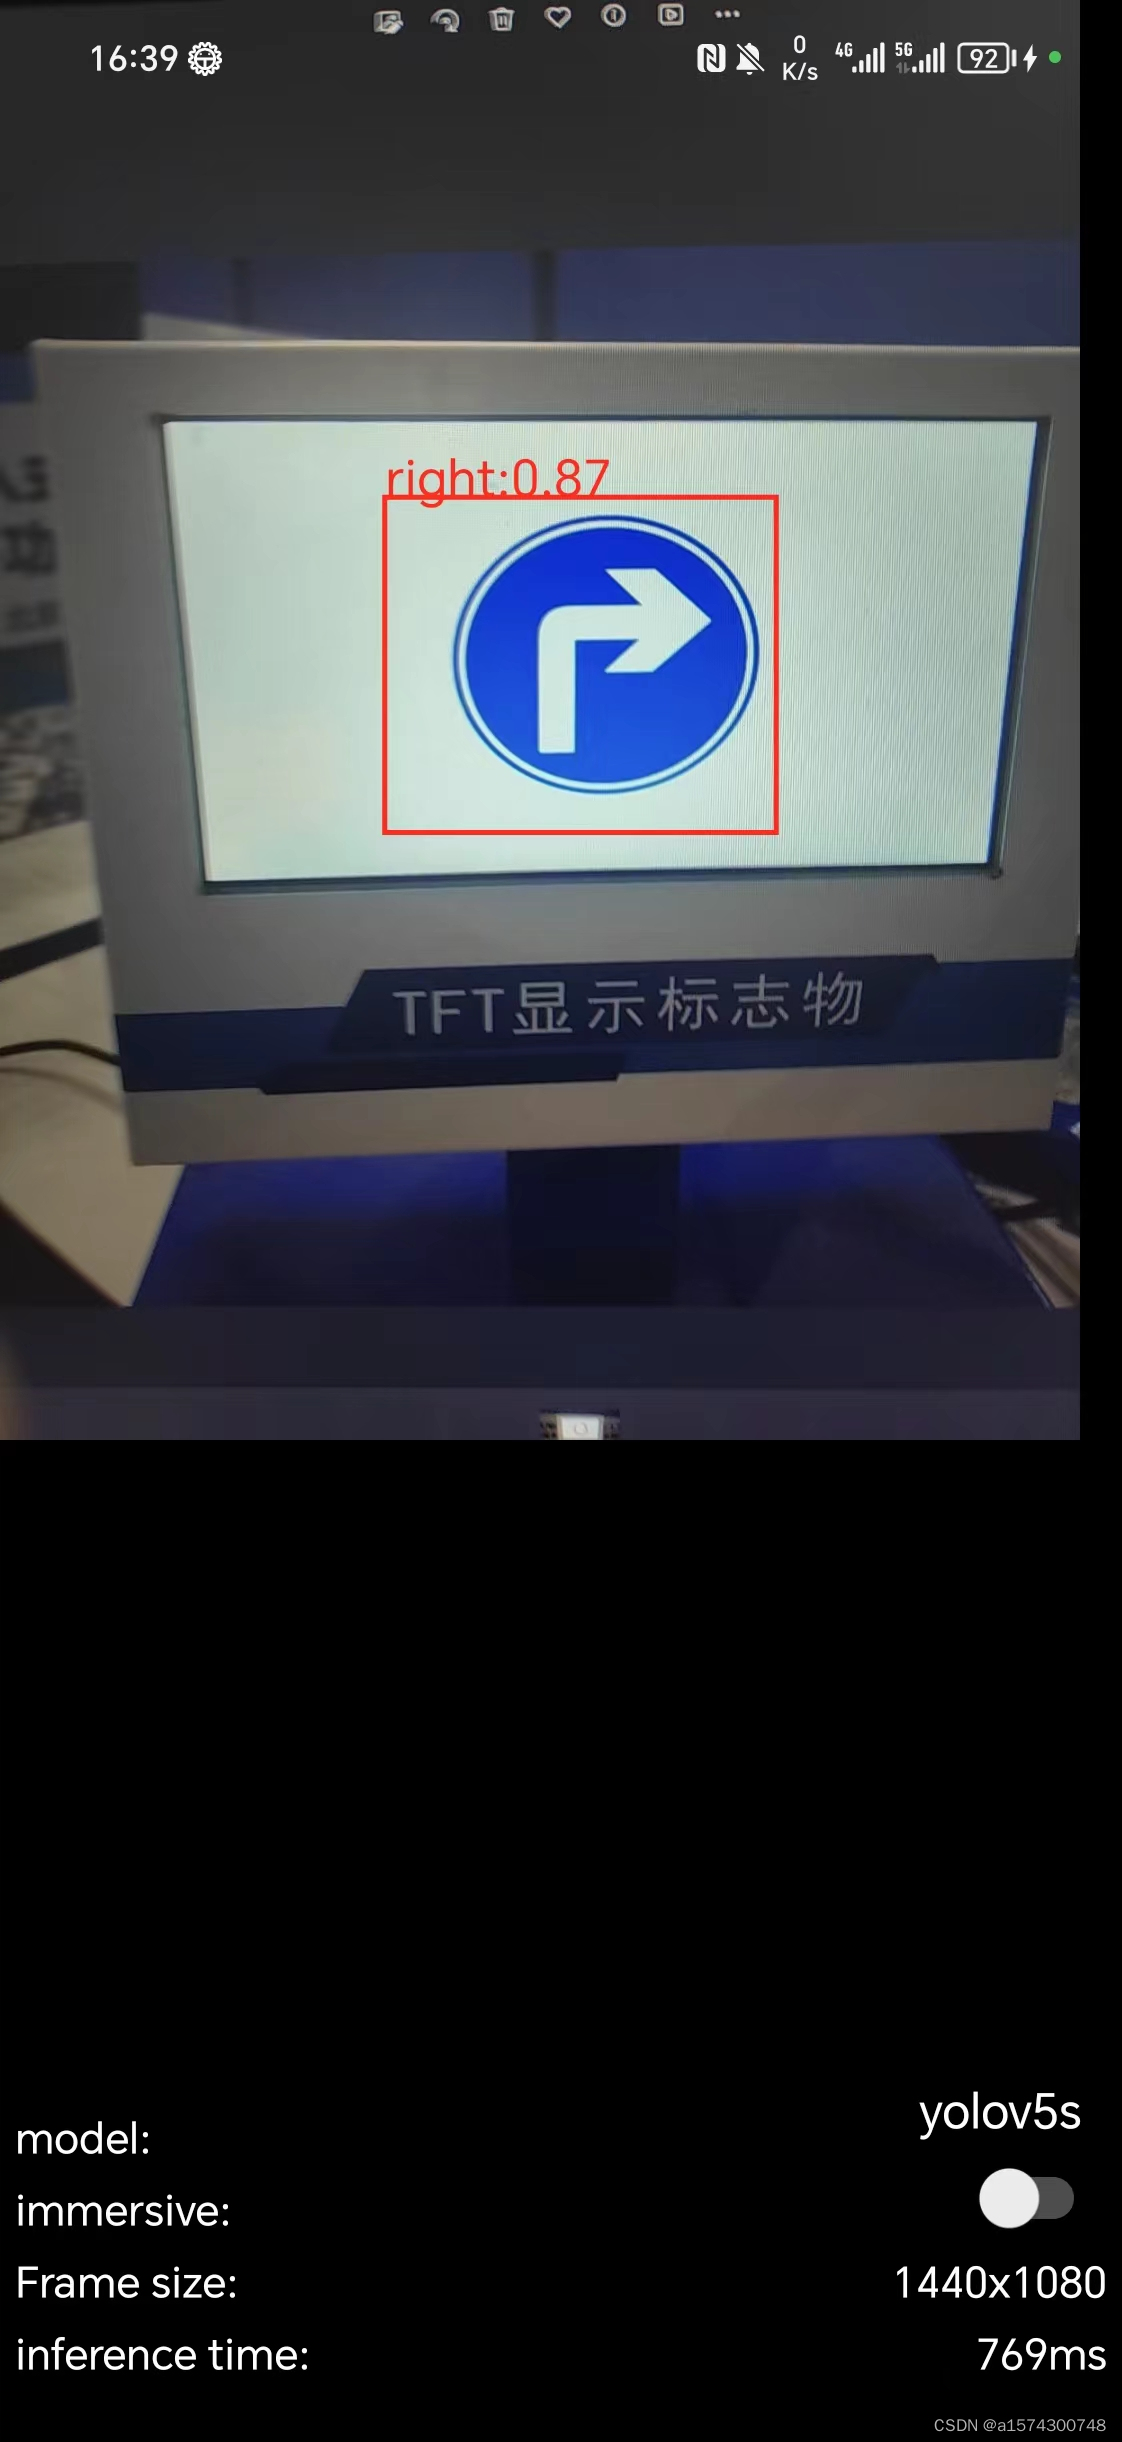
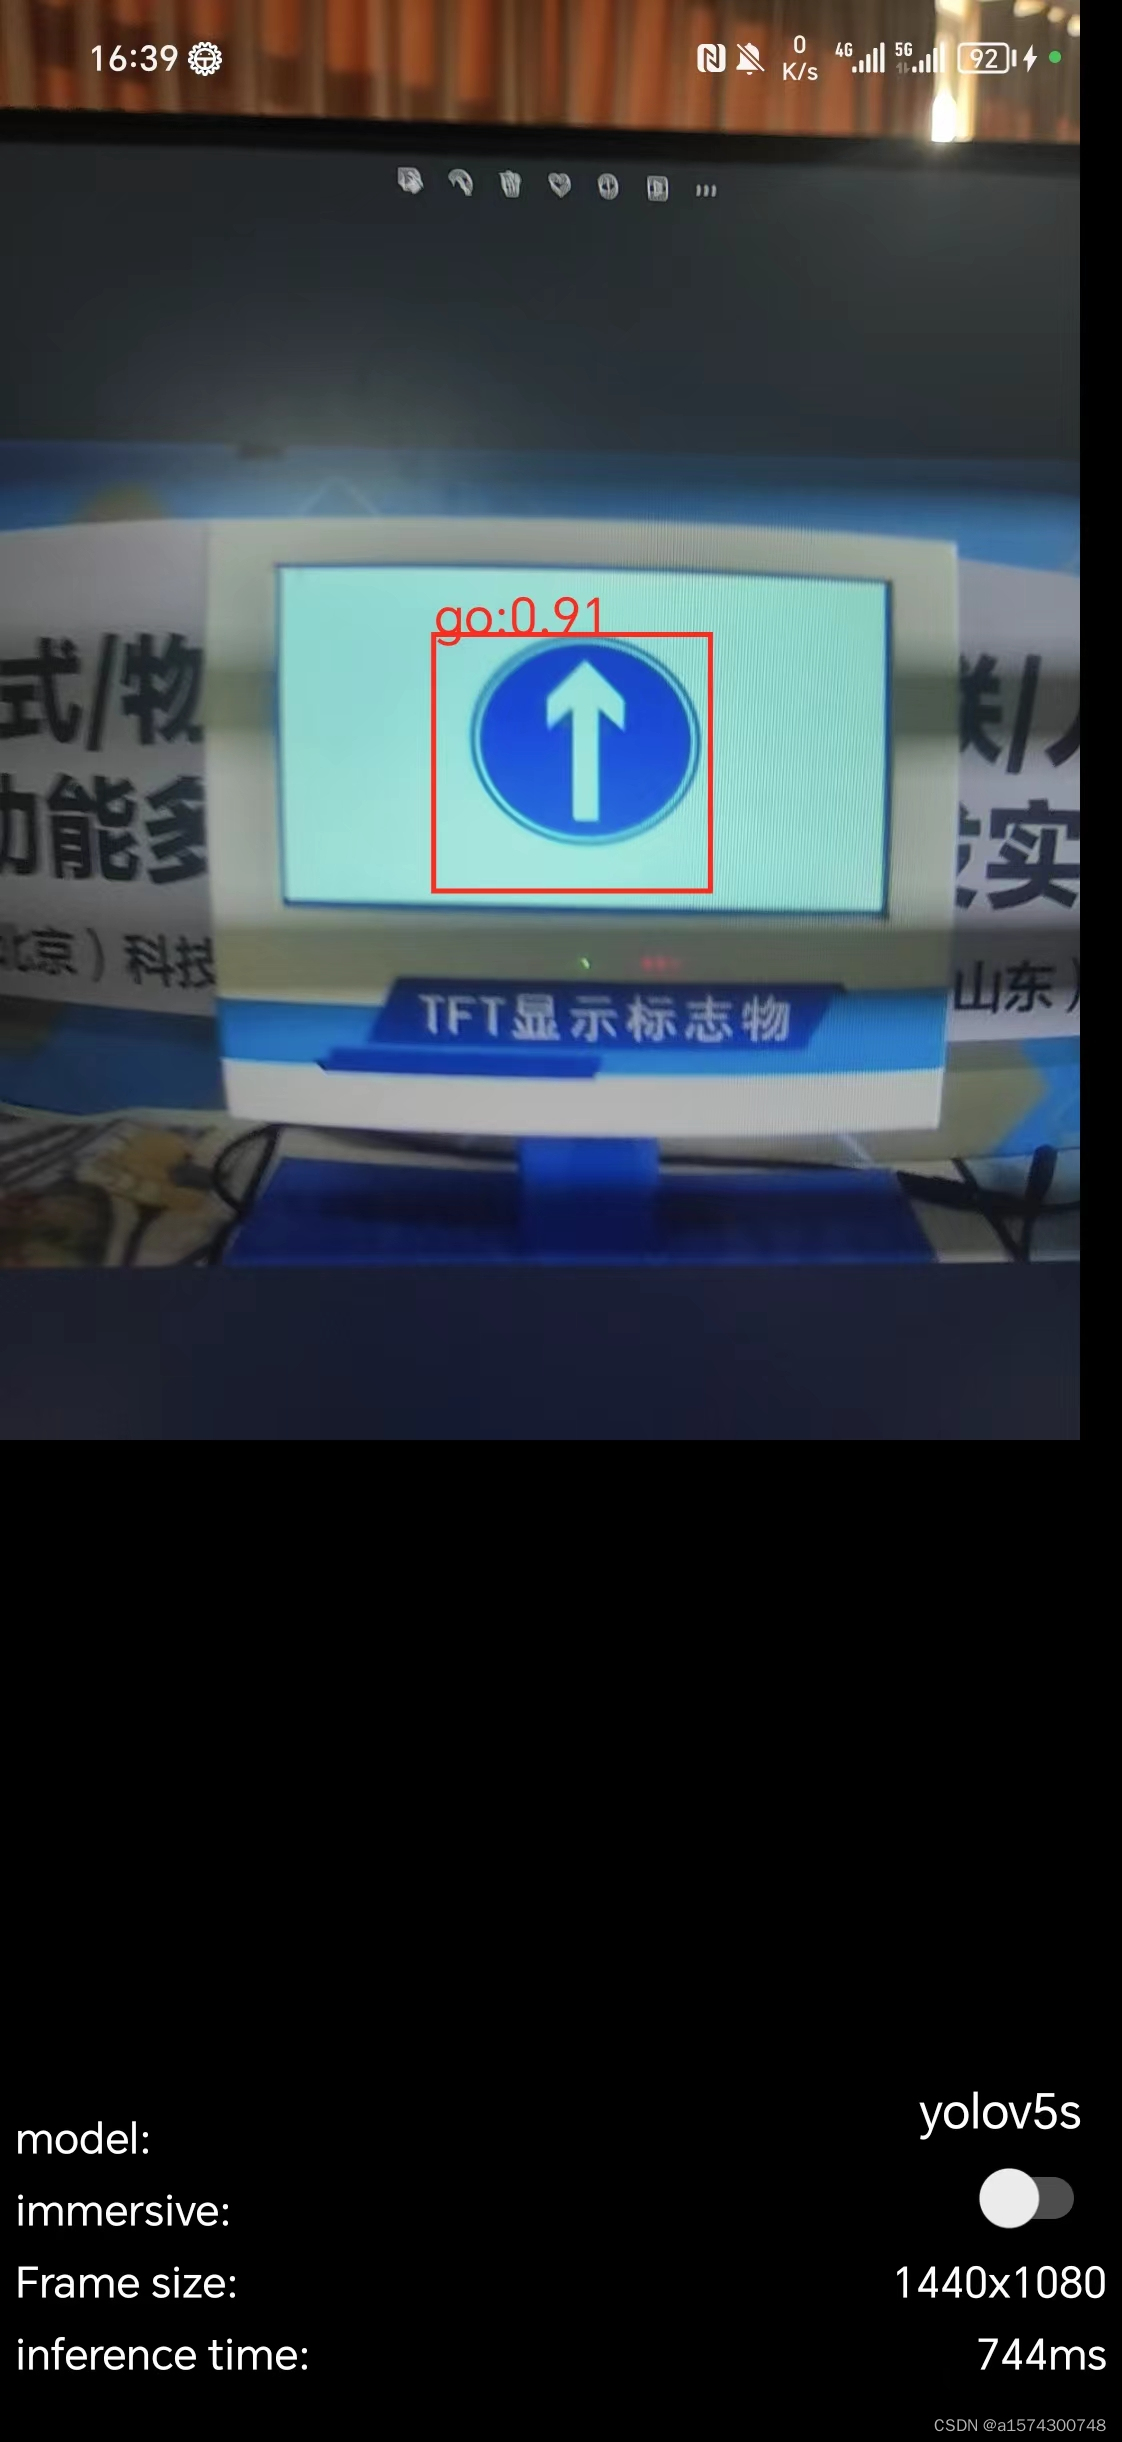
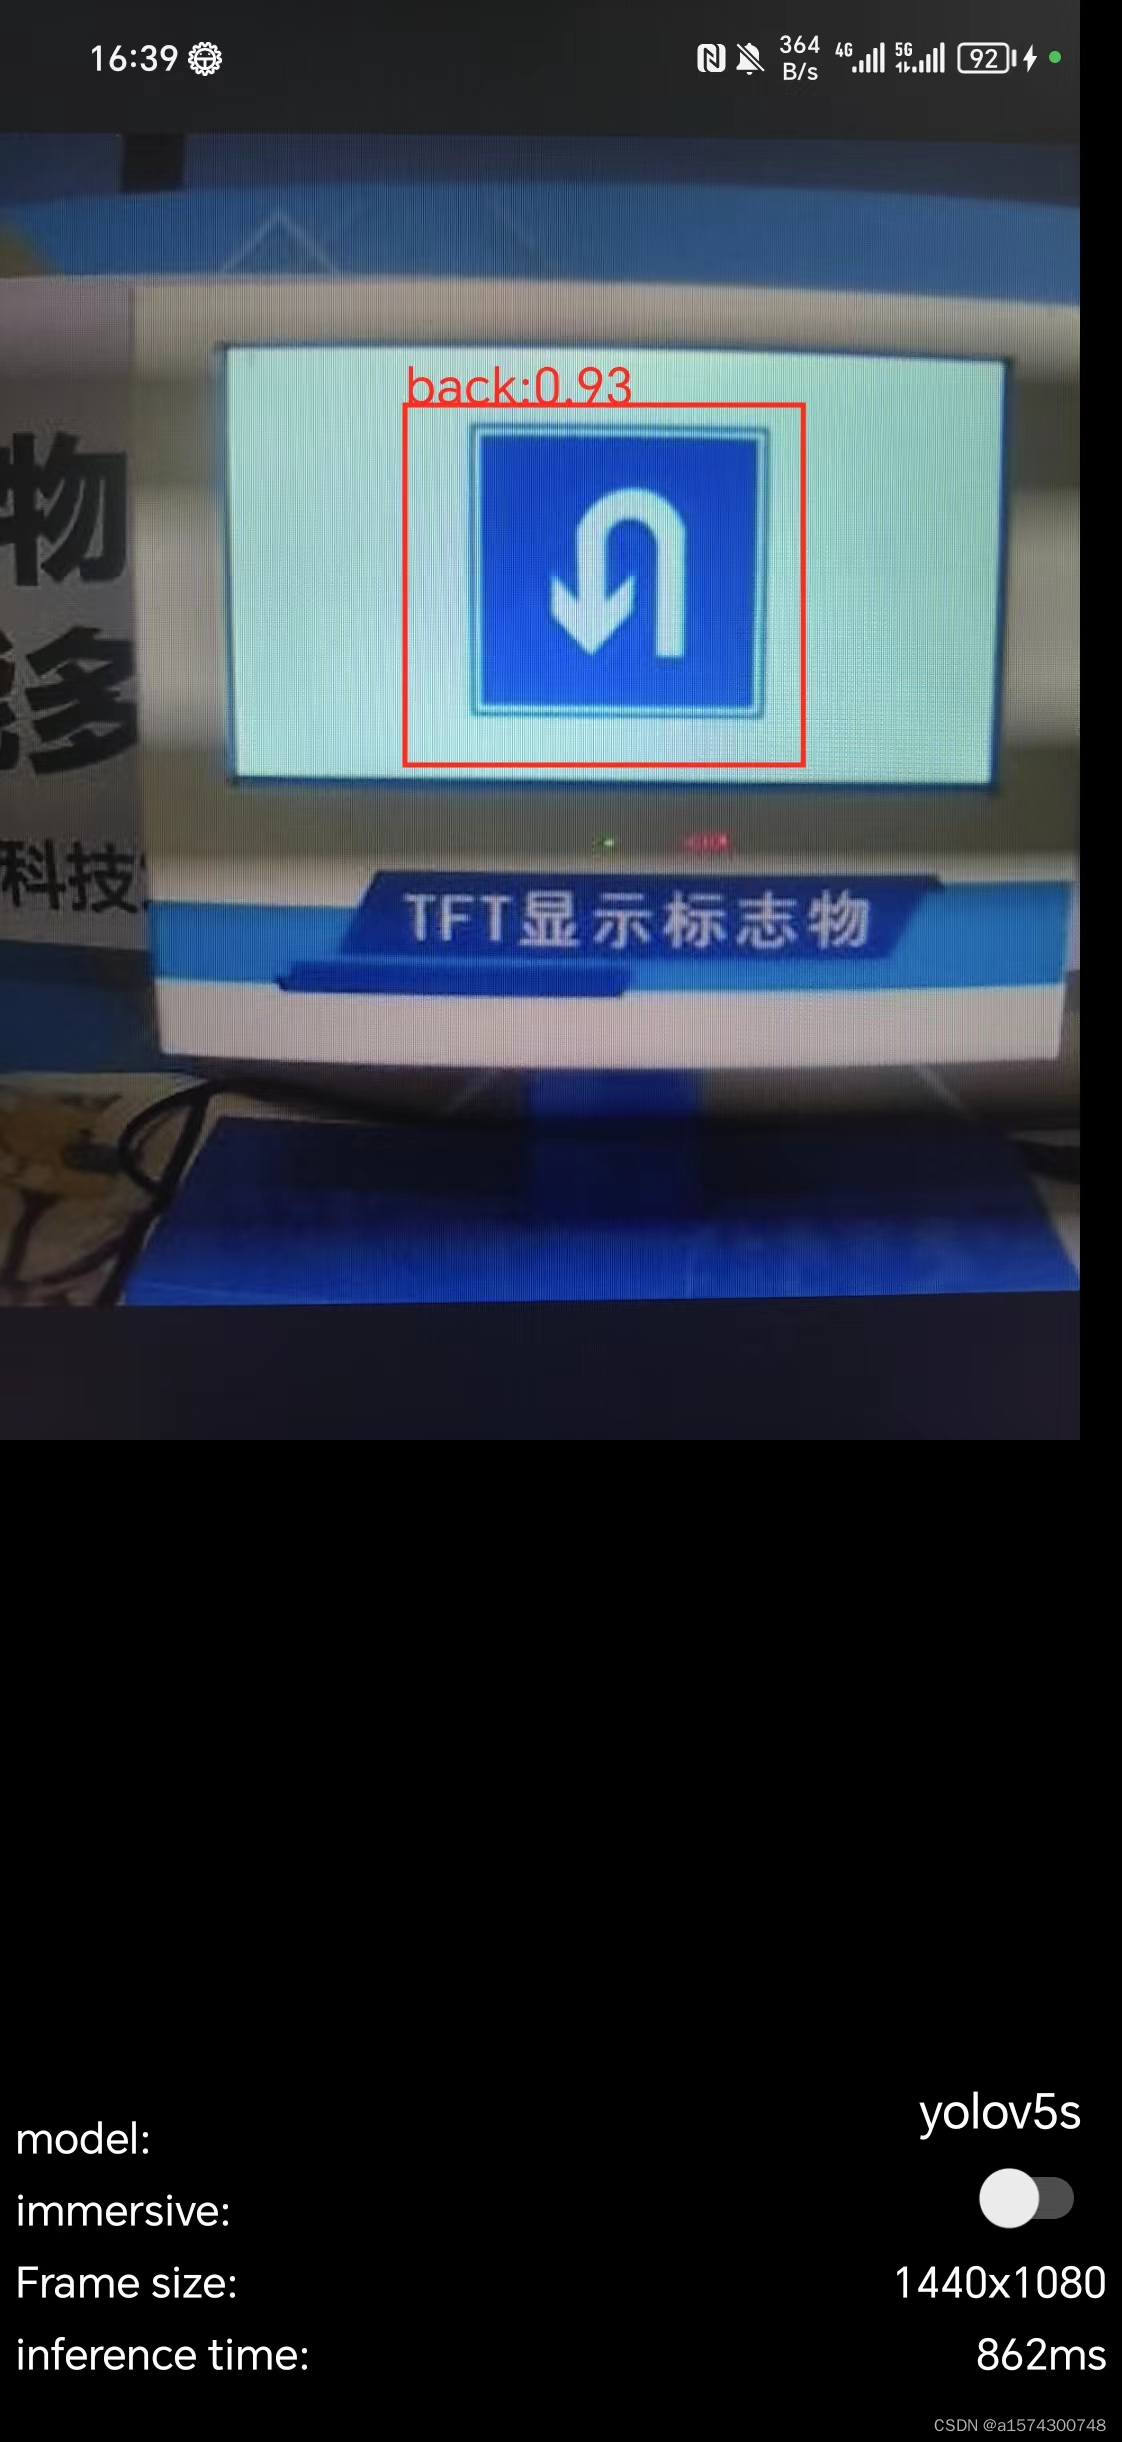
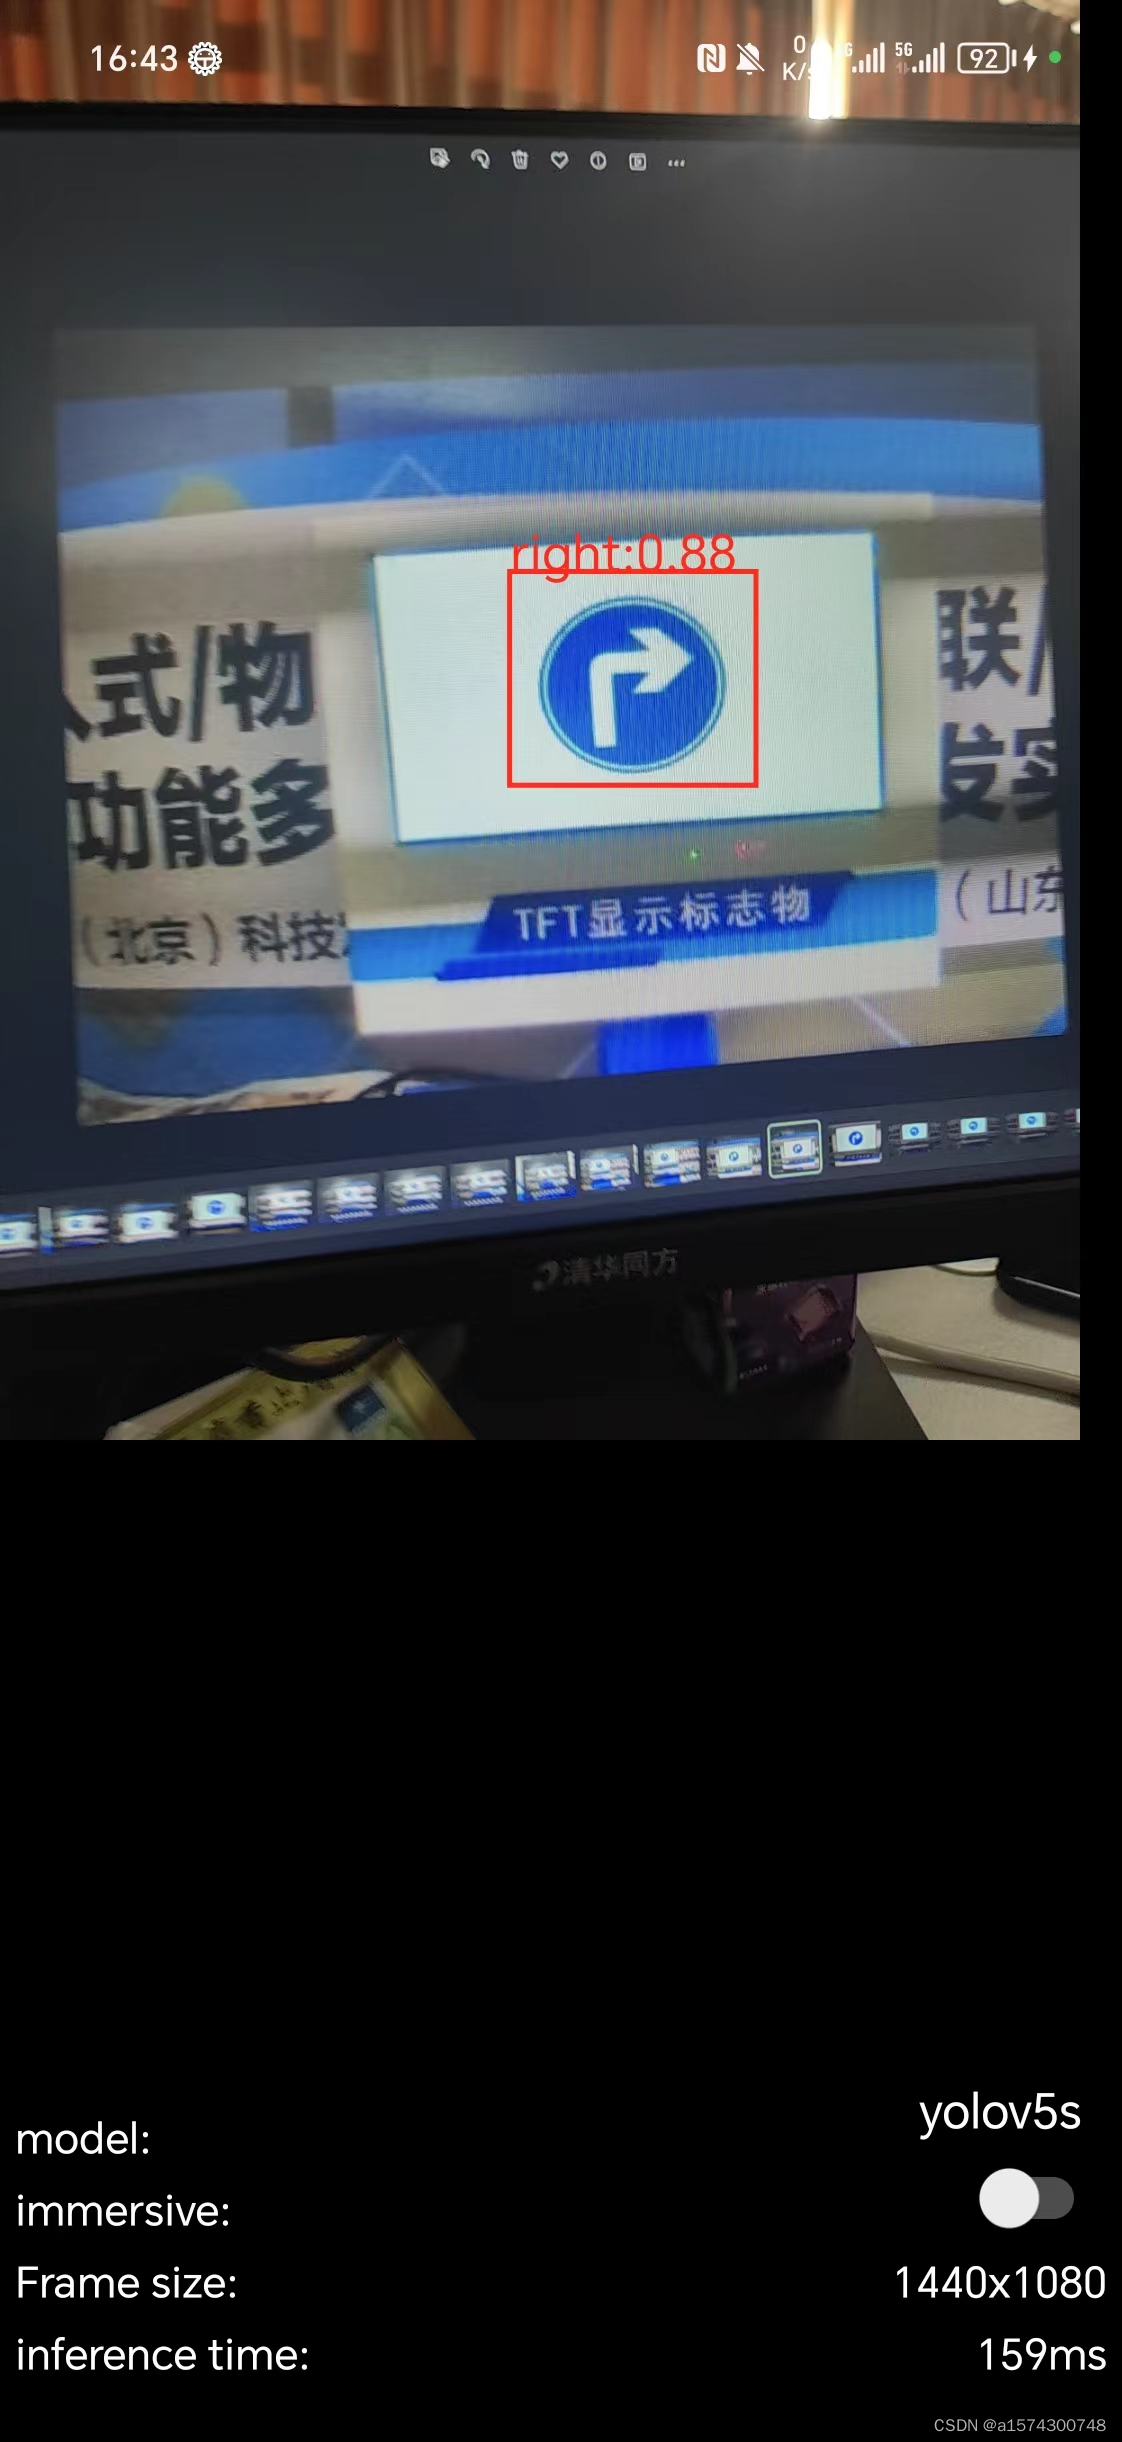
Step 8: Run the software
We can see that it has been successfully run
Step 9: Optimize the speed
So far, the yolov5 model has been successfully embedded into the app, but the speed is still a bit slow.

You can add this code here

As you can see, this was successfully achieved