automated test
In the process of software development, testing is a necessary process for functional acceptance. This process is often participated by testers, who write test cases in advance, and then manually test the test cases. After the test cases pass, the function can be considered to pass the acceptance. But There are often associations or dependencies between multiple functions in the software. The addition or modification of a certain function may affect other functions. At this time, testers need to perform regression tests on related or all functions of a software to confirm The system runs normally, but it adds a lot of workload to the testers.
Automated testing is a process of transforming human-driven testing behavior into machine execution, which can solve the problem of heavy regression testing workload in traditional manual testing.
Selenium
Web application automation is the automated testing of web applications, and Selenium is an automated testing framework for web applications, including a series of tools and libraries to support the automation of web applications running on browsers, according to Selenium’s official website :”Selenium automates browsers. That’s it!”. Concise and clear.
Selenium consists of the following main components:
Library: A class library used to support different languages, including various language bindings, such as Java, Python, JavaScript, etc.
Driver: Used for direct operation of the browser, similar to real users; different browsers have different drivers.
WebDriver: The collective name of Library and Driver, including language bindings and encapsulation of browser operations.
Selenium IDE: Used to record test scripts, to assist users in quickly creating tests.
The relationship between each component is as follows:

Understanding the components
How it works
The working principle of Selenium is as follows:

How does selenium interact with the Web browser
The specific process is as follows:
Developers choose one of the different language bindings provided by Selenium and write code
Selenium converts the code written by developers into unified operation instructions
Selenium encapsulates the operation instructions according to the JSON format, and sends the request to the Browser Driver through the HTTP protocol
Browser Driver drives the browser to perform corresponding operations after parsing the instructions
Install
As mentioned above, two components need to be installed for Selenium to work:
Library: Since we are using JavaScript, we only need to install the corresponding components
Driver: Let’s take Chrome as an example
Selenium Installation
1. Install the library
npm install selenium-webdriver
Copy Code
Node.js and npm need to be installed in advance.
2. Install Driver
Select the target browser and specific version number to download, and configure according to the configuration steps of different platforms:

Quick reference
Basic usage
Browser Navigation Actions
const { Builder } = require('selenium-webdriver');

(async function myFunction() {
  let driver = await new Builder().forBrowser('chrome').build();

  // navigate to a website
  await driver.get('https://baidu.com');
  // return
  await driver. navigate(). back();
  // go forward
  await driver.navigate().forward();
  // refresh
  await driver.navigate().refresh();

  await driver. quit();
})();
Copy Code
element positioning
const { Builder } = require('selenium-webdriver');

(async function myFunction() {
  let driver = await new Builder().forBrowser('chrome').build();

  // by id
  const cheese = driver. findElement(By. id('cheese'));
  // by css
  const cheddar = driver. findElement(By. css('#cheese #cheddar'));
  // by xpath
  const cheddar = driver.findElement(By.xpath('//title[@lang='eng']'));

  await driver. quit();
})();
Copy Code
There are many specific supported positioning methods, as shown in the following table:

Locating elements
XPath syntax
element manipulation
const { Builder } = require('selenium-webdriver');

(async function myFunction() {
  let driver = await new Builder().forBrowser('chrome').build();

  // input text
  await driver.findElement(By.name('name')).sendKeys(name);
  // click
  await driver.findElement(By.css("input[type='submit']")).click();
  // drag the element to the target position
  const actions = driver. actions({ bridge: true });
  const source = driver. findElement(By. id('source'));
  const target = driver. findElement(By. id('target'));
  await actions.dragAndDrop(source, target).perform();

  await driver. quit();
})();
Copy Code
Performing actions
other operations
const { Builder } = require('selenium-webdriver');

(async function myFunction() {
  let driver = await new Builder().forBrowser('chrome').build();

  // return the current URL
  await driver. getCurrentUrl();
  // screenshot (returns base64 encoded string)
  let encodedString = driver. takeScreenshot();

  await driver. quit();
})();
Copy Code
Example
Below we use Baidu to conduct a simple demonstration, the specific process is as follows:
- Use a browser to open the Baidu homepage
- Search for “selenium”
- Select Baidu Encyclopedia in the result list
- Open Baidu Encyclopedia
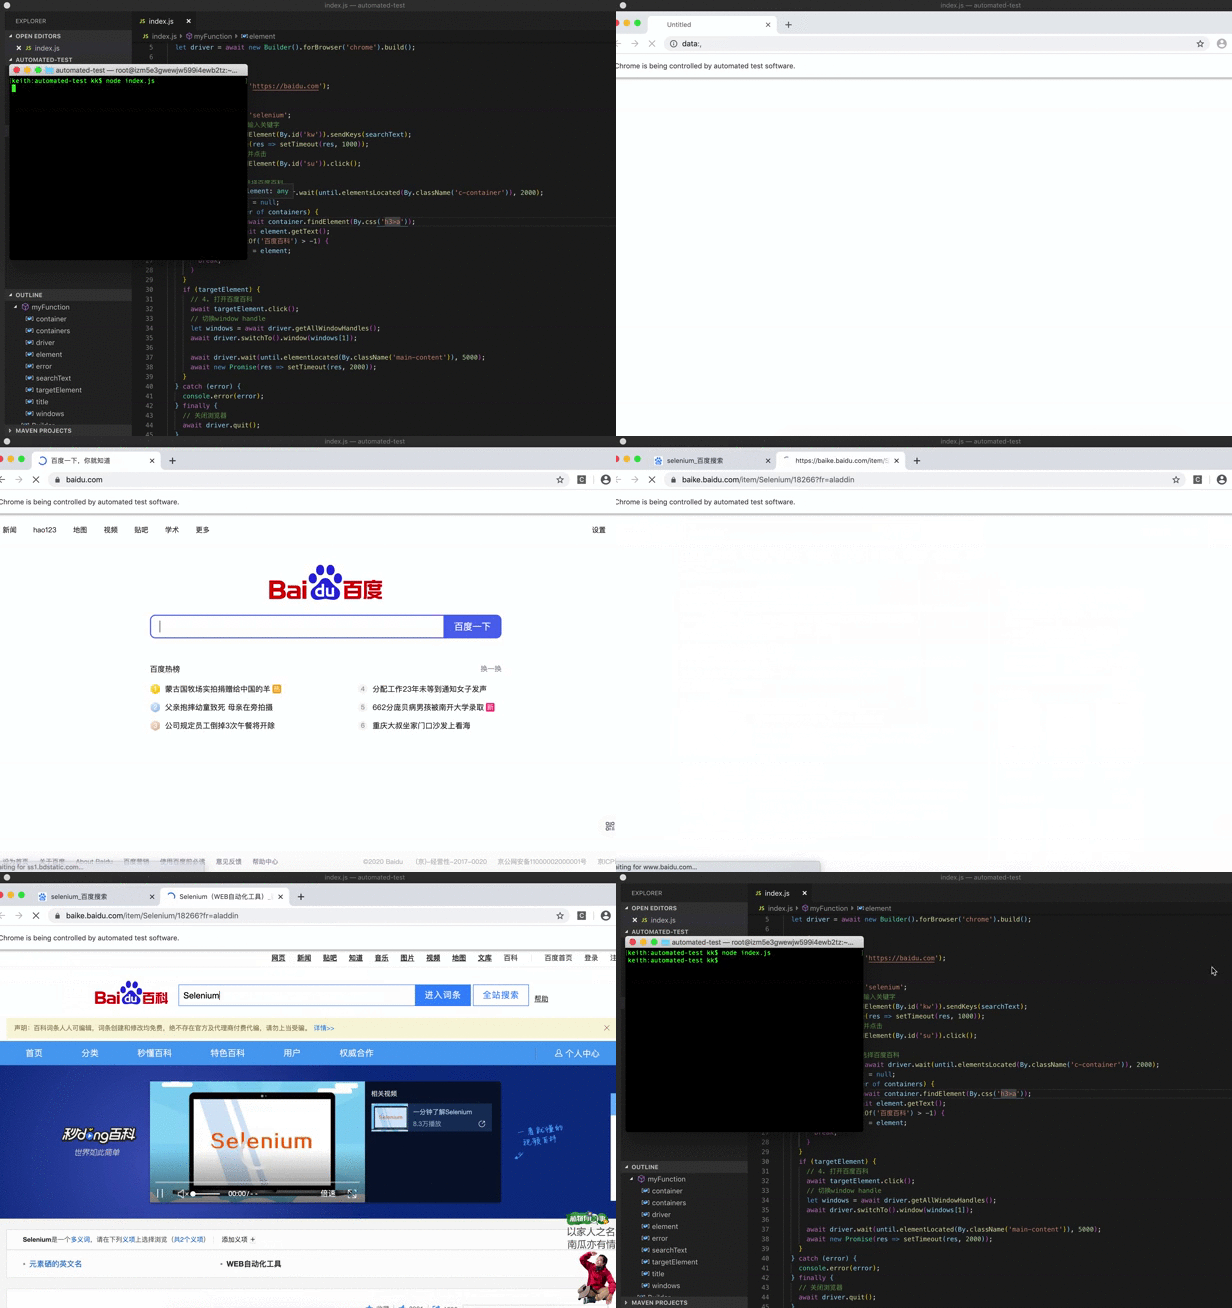
The effect is as follows:

code show as below:
const { Builder, By, until } = require('selenium-webdriver');

(async function myFunction() {
  // Create a driver instance
  let driver = await new Builder().forBrowser('chrome').build();
  try {
    // 1. Jump to Baidu
    await driver.get('https://baidu.com');

    // 2. search
    let searchText = 'selenium';
    // Navigate to the search box and enter keywords
    await driver.findElement(By.id('kw')).sendKeys(searchText);
    await new Promise(res => setTimeout(res, 1000));
    // Locate the search button and click it
    await driver.findElement(By.id('su')).click();

    // 3. Select Baidu Encyclopedia from the result list
    let containers = await driver. wait(until. elementsLocated(By. className('c-container')), 2000);
    let targetElement = null;
    for (let container of containers) {
      let element = await container. findElement(By. css('h3>a'));
      let title = await element. getText();
      if (title.indexOf('Baidu Encyclopedia') > -1) {
        targetElement = element;
        break;
      }
    }
    if (targetElement) {
      // 4. Open Baidu Encyclopedia
      await targetElement.click();
      // switch window handle
      let windows = await driver. getAllWindowHandles();
      await driver. switchTo(). window(windows[1]);

      await driver. wait(until. elementLocated(By. className('main-content')), 5000);
      await new Promise(res => setTimeout(res, 2000));
    }
  } catch (error) {
    console. error(error);
  } finally {
    // close the browser
    await driver. quit();
  }
})();
Copy Code
Of course, the above example demonstrates only the tip of the iceberg of Selenium’s powerful functions, just to show the basic operation.
Summary
This article introduces a solution for automated testing and web application automated testing: JavaScript + Selenium, and uses examples to demonstrate some of Selenium’s functions. Selenium can do a lot, and I will explore it later.
It should be noted that when using this solution in an actual project, it should be written in conjunction with mocha.