1. Install Anaconda
1. Download the Anaconda installation package
Go to the official website https://www.anaconda.com/download to download the Anaconda installation package suitable for your operating system.
(Take Windows as an example)
 2. Install Anaconda
 2. Install Anaconda
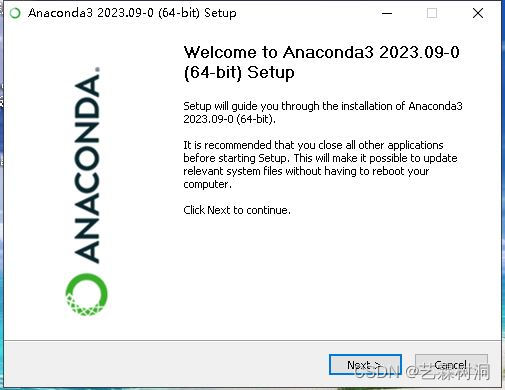
Double-click the downloaded “Anaconda3-2023.09-0-Windows-x86_64.exe” to install. Click “Next”.
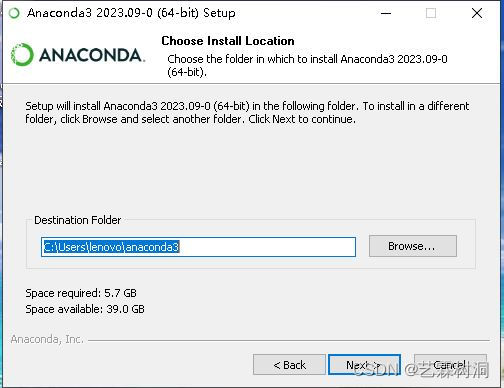
Select the installation path, preferably a path other than C drive.
Select “Installation Options” and choose according to your needs. Attached is a Chinese explanation.
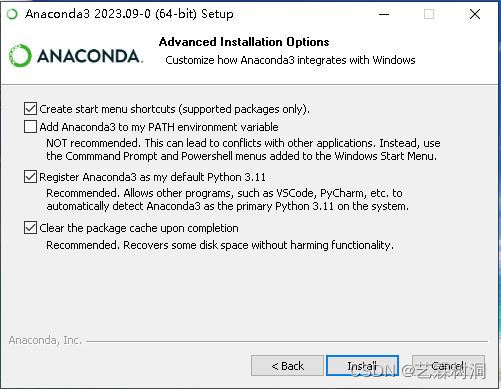
Create start shortcuts (supported packages only).
Create a start shortcut (supports packages only).
Add Anaconda3 to my PATH environment variable.
Added Anaconda3 to my PATH environment variable.
Not recommended. This can lead to conflicts with other applications.
Instead, use the Command Prompt and Powershell menus added to the Windows Start Menu.
Not recommended. This may cause conflicts with other applications. Instead, use Command Prompt and add Powershell menus to the Windows Start menu.
Register Anaconda3 as my default Python 3.10.
Registered Anaconda3 as my default for Python 3.10.
Recomended. Allows other programs, such as VSCode, PyCharm, etc.
to automatically detect Anaconda3 as the primary Python 3.10 on the system.
recommend. Allow other programs like VSCode, PyCharm, etc. to automatically detect Anaconda3 as the main Python 3.10 on the system.
Clear the package cache upon completion.
Clear the package cache when finished.
Recommended. Recovers some disk space without harming functionality.
recommend. Recover some disk space without compromising functionality.
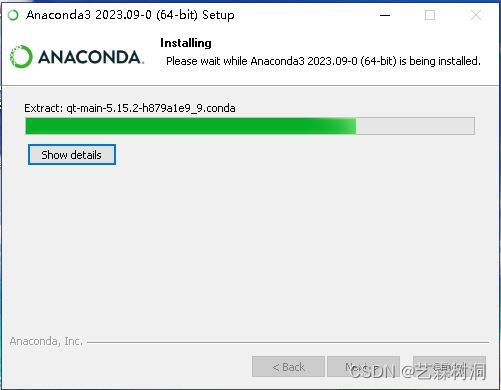
Click “Install” and wait for the installation to complete.
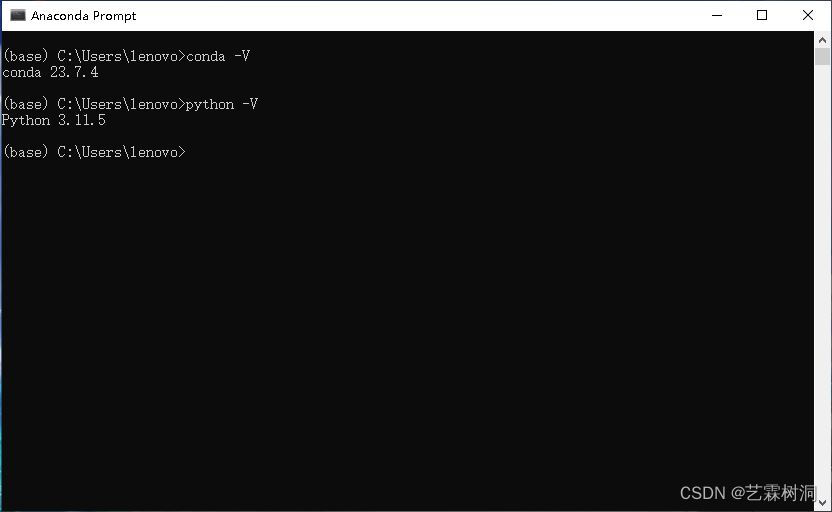
3. Verify Anaconda
After the installation is completed, click the “win” key, and “Anaconda Prompt” will appear. Then double-click to enter and enter several verification commands. When the installed version appears, the verification is successful.
conda -V
python -V
4. Create a virtual environment
This includes the environment name and python version name (mine is 3.11), install the new environment.
conda create -n environment name python=version
conda create -n pytorch_gpu_23.7.4 python=3.11
5. Activate the current environment
Enter “conda activate pytorch_gpu_23.7.4” to activate the current environment. Do not exit after that, enter “python” and check whether the installed python version is correct. Type exit() to exit.
conda activate pytorch_gpu_23.7.4

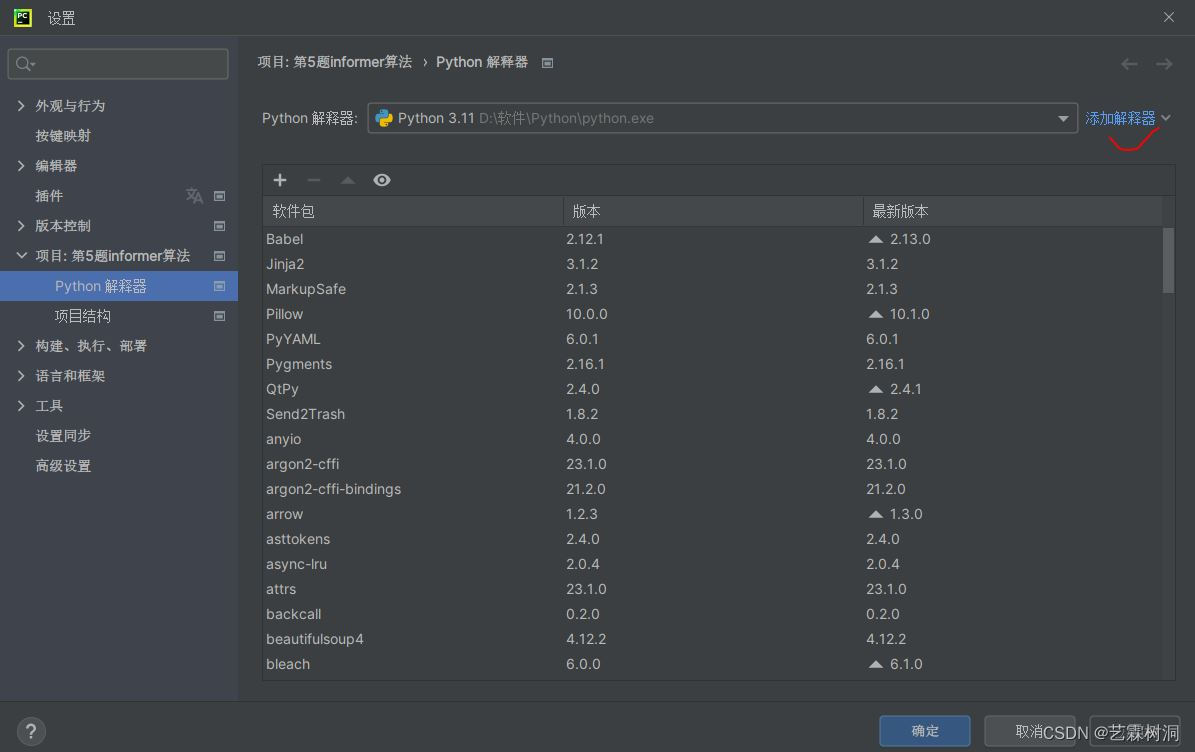
6. Set up the interpreter
(1) Open Pycharm, click “File-Settings” and add an interpreter (add a local interpreter).
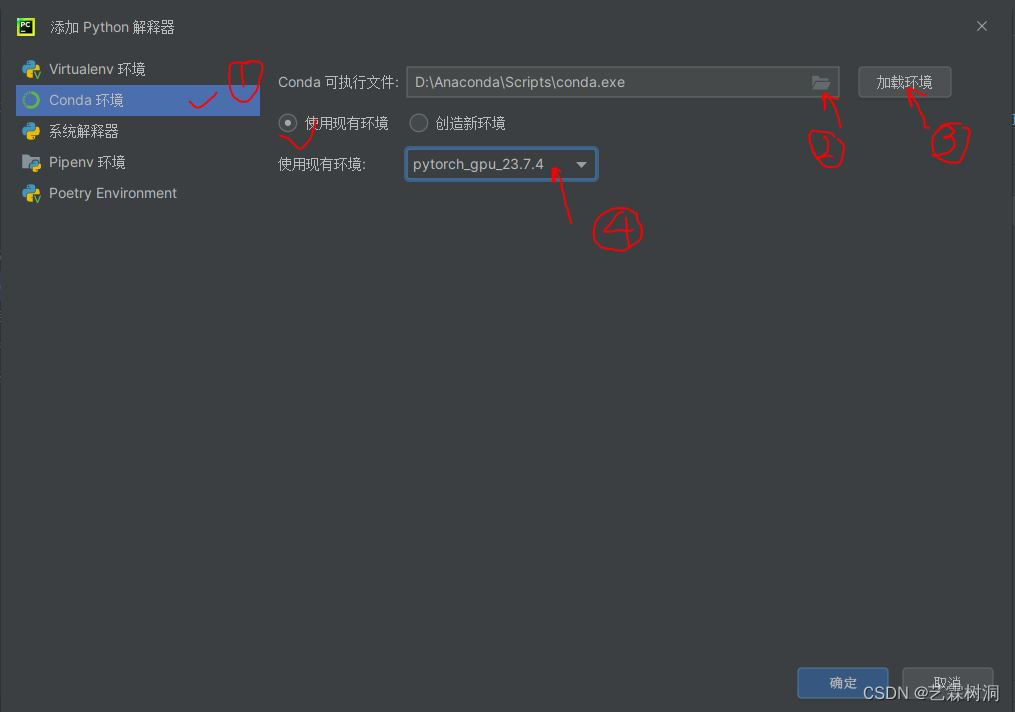
(2) Add Conda environment
Click “Conda Environment” – select the Conda executable file path – click “Load Environment” – select “Use Existing Environment” – select the just created virtual environment “pytorch_gpu_23.7.4”.
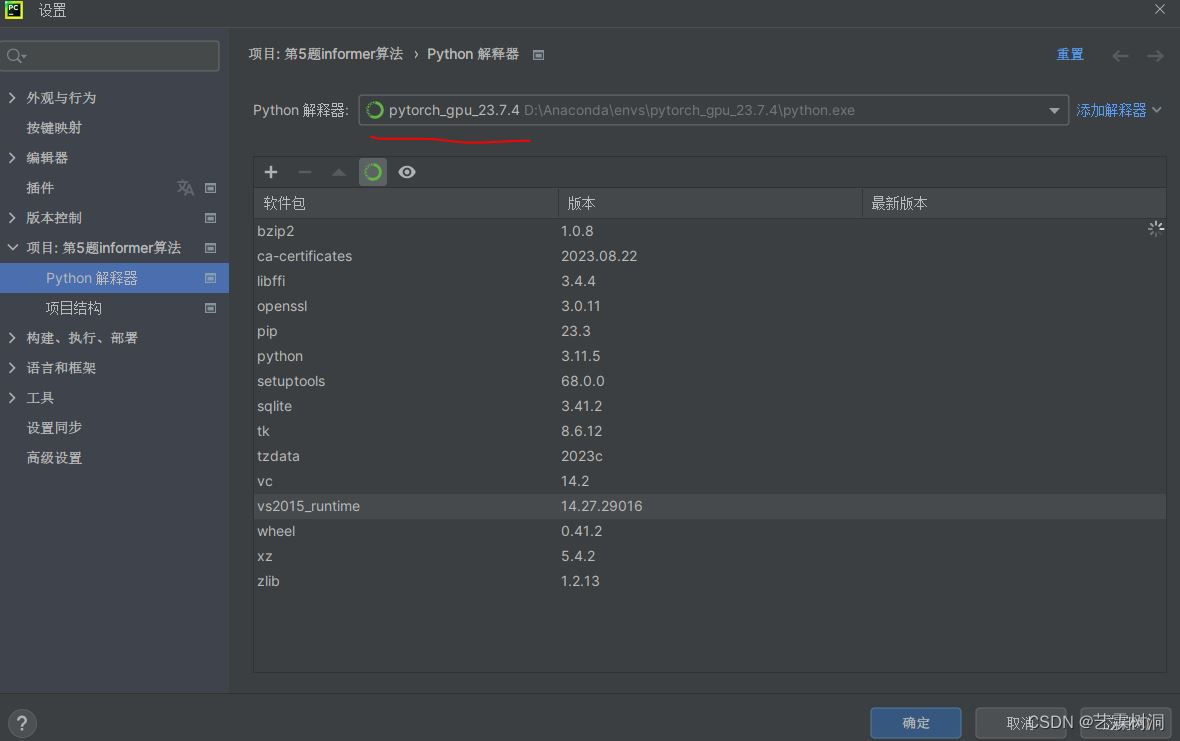
The interpreter now becomes “pytorch_gpu_23.7.4”.
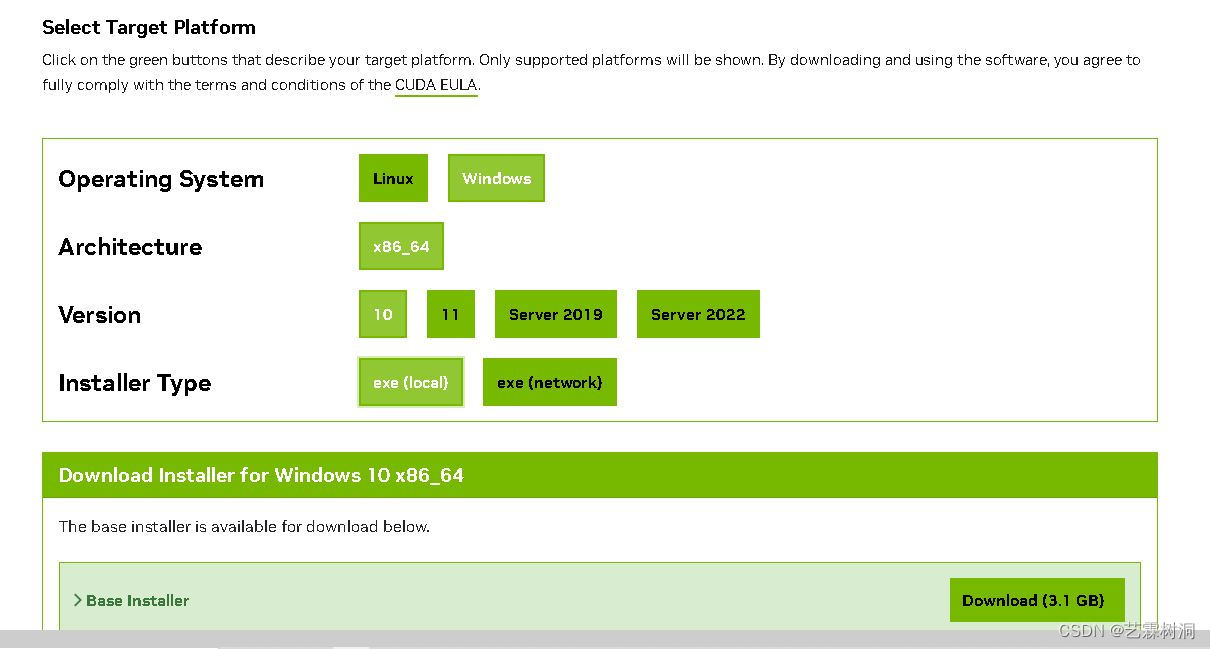
2. Install CUDA
1. Download the installation package
Open the CUDN official website (CUDA Toolkit 12.3 Downloads | NVIDIA Developer), select according to your computer version and installation requirements, and then click to download.
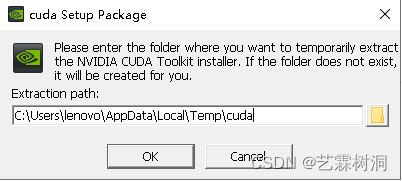
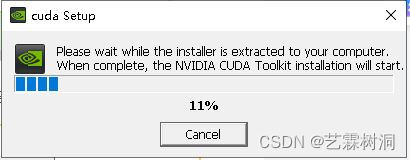
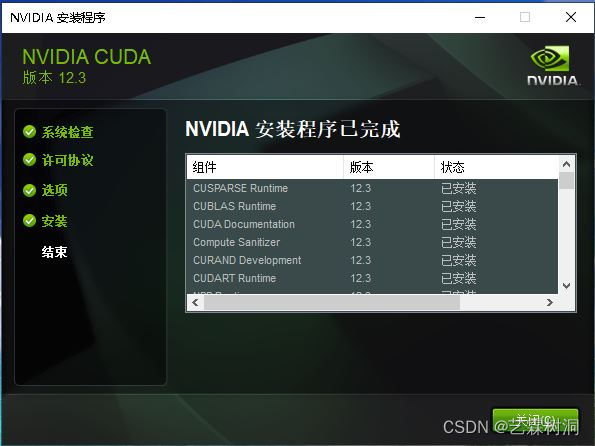
2. Install CUDA
After the download is complete, double-click to install. It is recommended to install it in the default path, which will be used later.
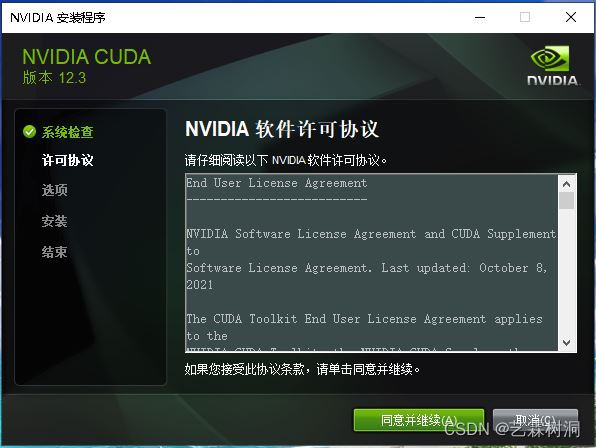
After the system checks compatibility, this interface appears. Click “Agree and Continue”. A “lite” installation is enough.
3. Verify whether CUDA is installed successfully
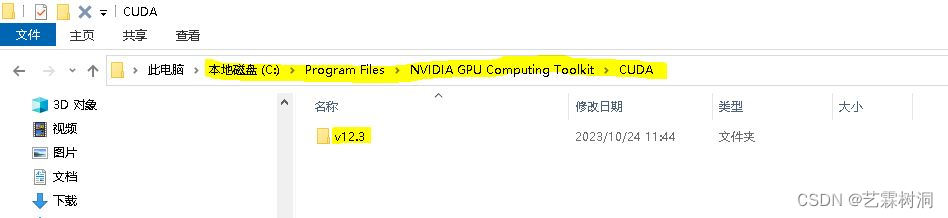
Enter the path where the cuda folder is located: C:\Program Files\\
VIDIA GPU Computing Toolkit\CUDA. Check whether the version you installed is correct.
Enter “v12.3-bin” and copy the path. “win + R” – “cmd” to open the command prompt, enter in the terminal:
cd C:\Program Files\\
VIDIA GPU Computing Toolkit\CUDA\v12.3\bin
nvcc -V
After entering the bin folder, enter “nvcc -V” to check the cuda version. If it matches the installed version, the verification is successful. 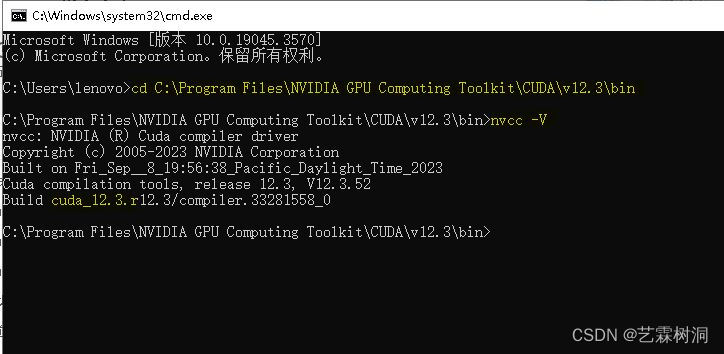
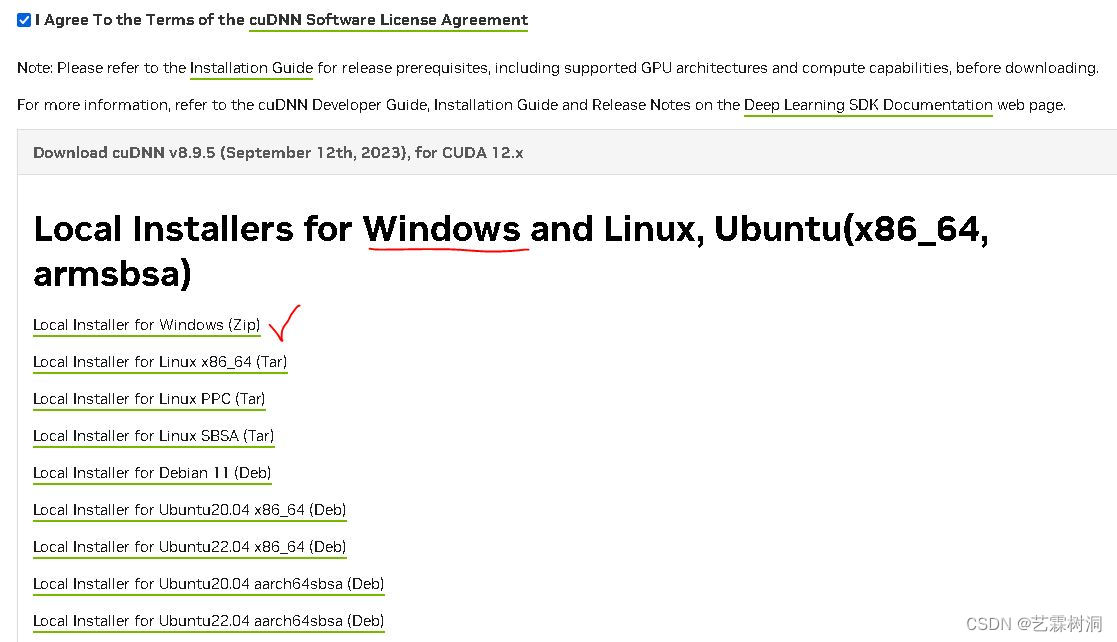
3. Install cuDNN
1. Download the installation package
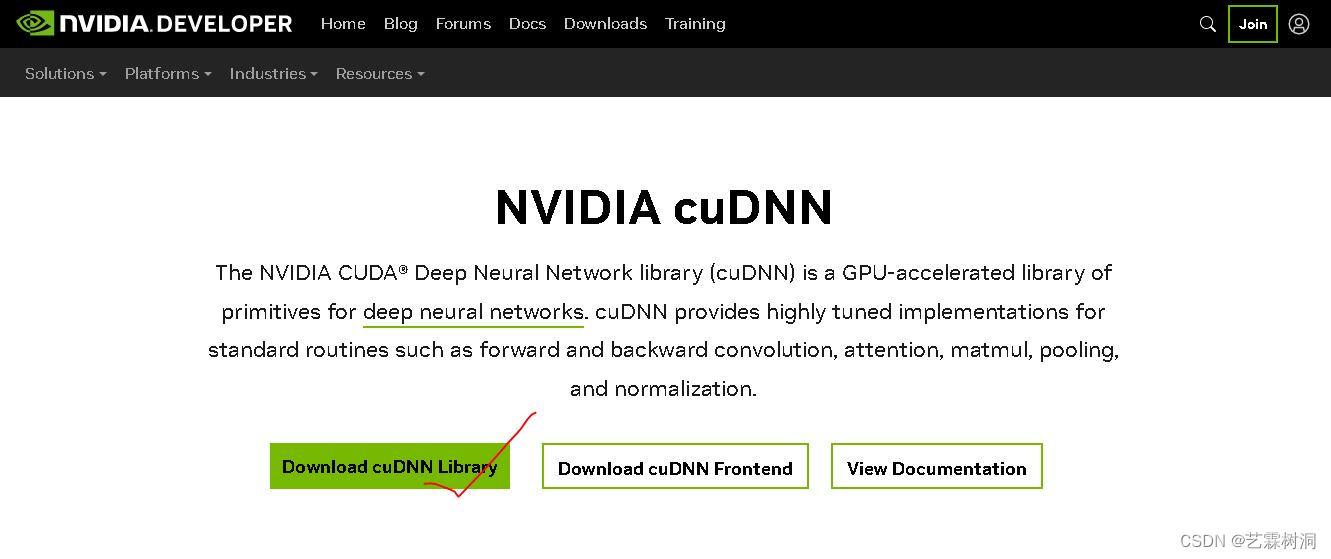
Download from the official website (CUDA Deep Neural Network (cuDNN) | NVIDIA Developer) and select “Library”.
Install cuDNN according to the CUDA version you just installed. Be careful not to choose the wrong one.
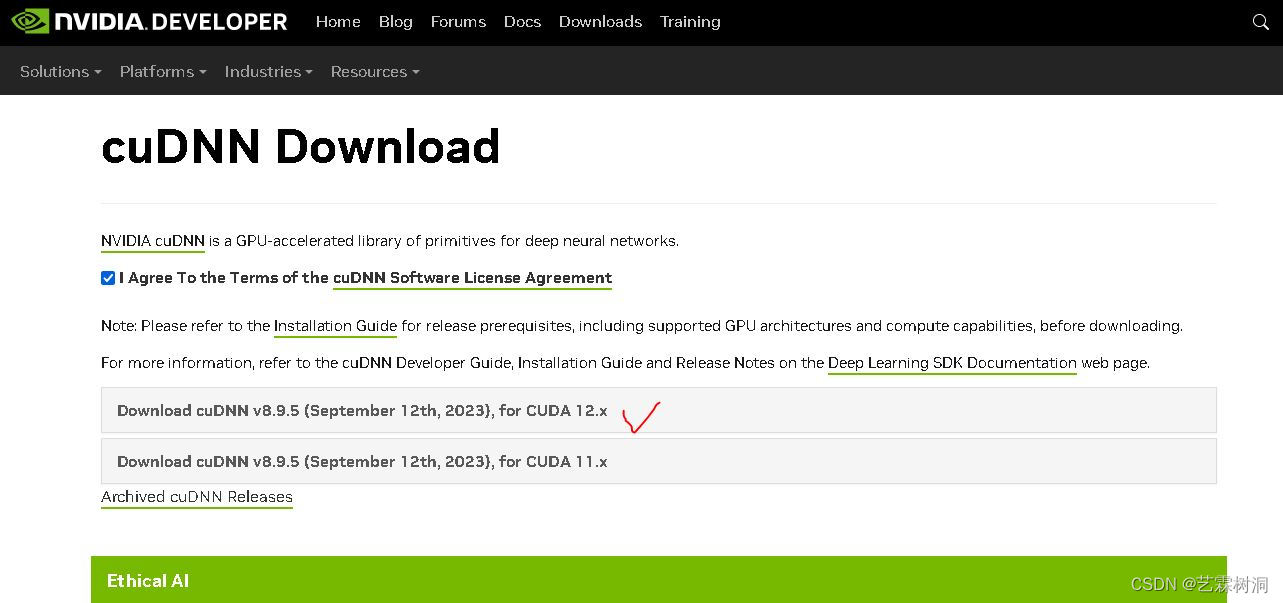
This article uses Windows as an example, so we choose the Win version.
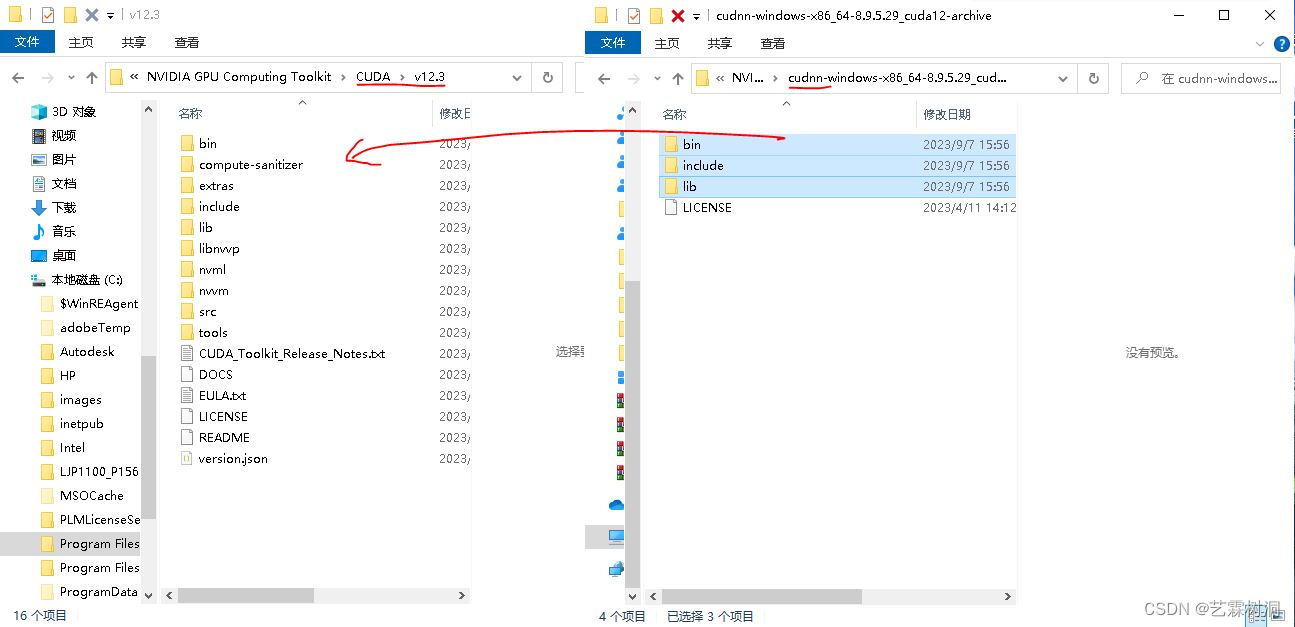
2. Install cuDNN
You can unzip the cudnn folder to the upper-level directory folder “NVIDIA GPU Computing Toolkit” where the cudn folder is located. After decompression is complete, copy the bin, include, and lib folders under the cudnn folder to the “CUDN-v12.3” folder.

3. Verify whether the installation is successful
Enter the path: C:\Program Files\\
VIDIA GPU Computing Toolkit\CUDA\v12.3\extras\demo_suite. Copy the path and enter it on the command line:
cd C:\Program Files\\
VIDIA GPU Computing Toolkit\CUDA\v12.3\extras\demo_suite
(Note: The cd command is: go to this path.)
Then enter respectively:
bandwidthTest.exe
deviceQuery.exe
If both display “Result = PASS”, the verification is successful.
4. Problems that may easily occur
During the verification process, we may encounter this problem: CUDA driver version is insufficient for CUDA runtime version. (The Cuda driver version is not sufficient for the CUDA runtime version).
The CUDA runtime library and CUDA driver are two independent software components. The CUDA runtime library is used to execute CUDA programs, and the CUDA driver is a driver used to manage and control CUDA devices. When the CUDA runtime library and CUDA driver versions do not match, the above error message will appear.
The way to solve this problem is to install the matching CUDA runtime library and CUDA driver. Solution steps:
4.1 Check the NVIDIA version of the computer (provided the computer has an NVIDIA graphics card)
Enter “nvidia-smi” in cmd
(Note: nvidia-smi contains the highest cuda version corresponding to the driver, as long as this version is greater than or equal to the cuda you installed)
4.2 Confirm the current CUDA runtime version
Enter the following command in the terminal (Anaconda Prompt) to view the version number of the CUDA runtime library installed in the current system:
nvcc --version
4.3 Find the matching CUDA driver version on the official website and install it
4. Install pytorch (2 methods)
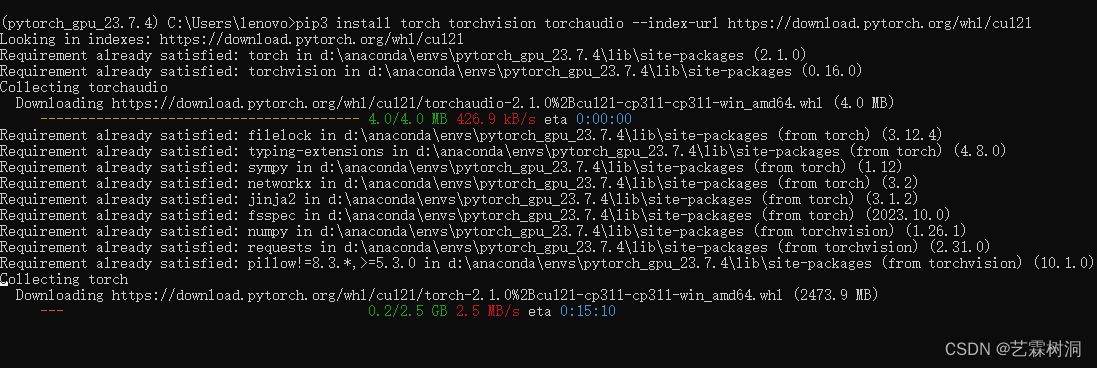
4.1 Method 1: Install Pytorch online with pip (recommended)
(1) Enter the PyTorch official website (PyTorch). Click “Get Started” and select the CUNA version supported by your computer.

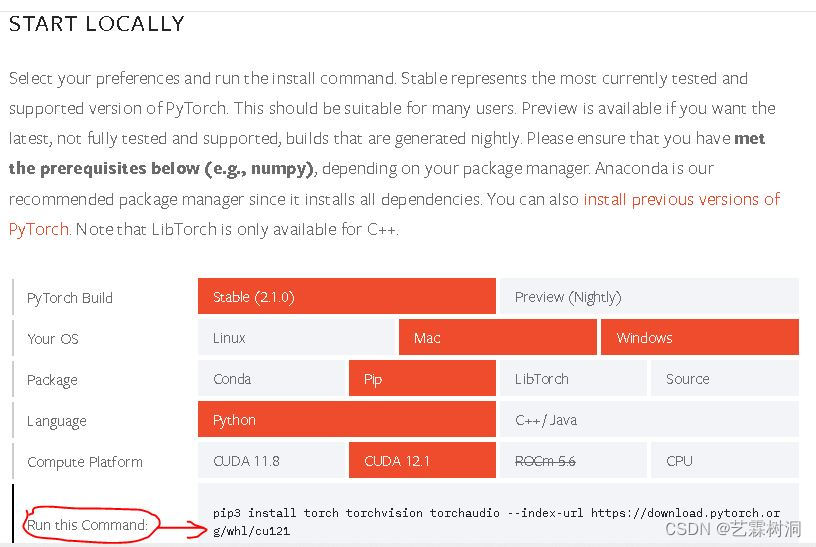
The pip command is:
pip3 install torch torchvision torchaudio --index-url https://download.pytorch.org/whl/cu121
Includes the following 3 packages:
- torch: core package, integrating the core functions of pytorch
- torchvision: package provided for image processing
- torchaudio: package provided for language processing
(2) Enter the newly created Pytorch virtual environment. Enter the following command:
conda activate pytorch_gpu_23.7.4
(3) Directly copy the pip command from the official website to the command line window to download:
Attached: Version correspondence table:
| torch | torchvision | python |
| 2.0 | 0.15 | >=3.8,<=3.11 |
| 1.13.0 | 0.14.0 | >=3.7.2, <=3.10 |
| 1.12.0 | 0.13.0 | >=3.7.2, <=3.10 |
| 1.11.0 | 0.12.0 | >=3.6, <=3.9 |
| 1.10.1 | 0.11. 3 | >=3.6, <=3.9 |
| 1.10.0 | 0.11.2 | >=3.6, <=3.9 |
| 1.9.1 | 0.11.1 | >=3.6, <=3.9 |
| 1.9.0 | 0.10.1 | >=3.6, <=3.9 |
| 1.8.2 | 0.10.0 | >=3.6, <=3.9 |
| 1.8.1 | 0.9.1 | >=3.6, <=3.9 |
| 1.8.0 | 0.9.0 | >=3.6, <=3.9 |
| 1.7.1 | 0.8.2 | >=3.6 , <=3.9 |
| 1.7.0 | 0.8.1/0.8.0 | >=3.6, <=3.8 |
| 1.6.0 | 0.7.0 | >=3.6, <=3.8 |
| 1.5.1 | 0.6.1 | >=3.5, <=3.8 |
| 1.5.0 | 0.6.0 | >=3.5, <=3. |
4.2 Method 2: Install Pytorch with conda
(1) Copy the conda download command from the official website and download from the command line
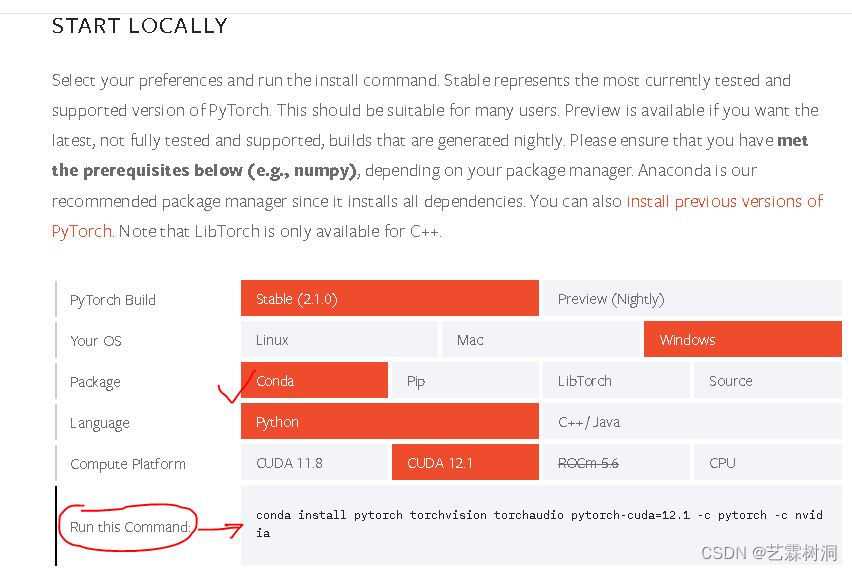
The conda command is:
conda install pytorch torchvision torchaudio pytorch-cuda=12.1 -c pytorch -c nvidia
Includes the following 4 packages:
- torch: core package, integrating the core functions of pytorch
- torchvision: package provided for image processing
- torchaudio: package provided for language processing
- pytorch-cuda=11.6: cuda tool
(Note: The speed is relatively slow, you can add a mirror address.)
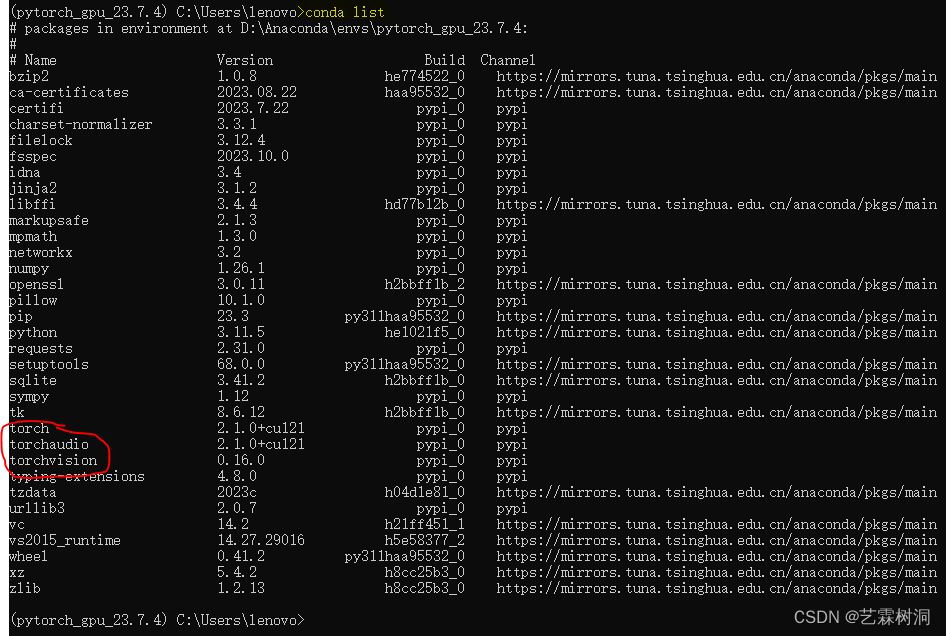
5. Verify whether Pytorch is installed successfully (2 methods)
5.1 Method 1
Enter the Pytorch virtual environment
conda activate pytorch_gpu_23.7.4
enter:
conda list
Check whether there is a corresponding package. If yes, it proves that the installation is successful.
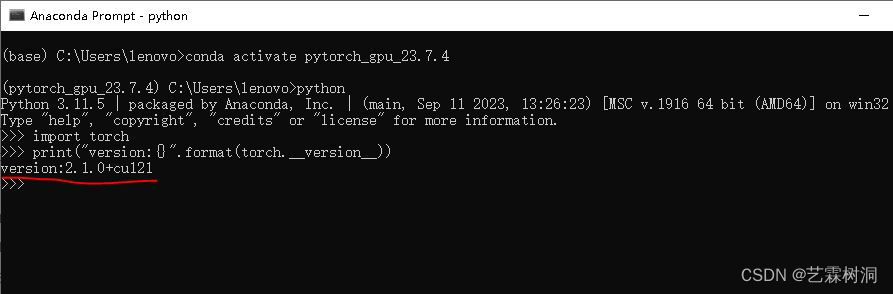
5.2 Method 2
Continuing from the method 1 step, enter:
python #Enter python
import torch #Call torch package
print("version:{}".format(torch.__version__))
If a string of the installation version is printed out, the installation is successful.
The knowledge points of the article match the official knowledge files, and you can further learn related knowledge. Algorithm skill tree Home page Overview 56910 people are learning the system